how to format a word doc for paperback on Amazon
While I recommend using a more powerful tool like InDesign to convert your finished book into a PDF, you can absolutely format a Word doc for paperback on Amazon if you don’t feel like buying and learning an expensive tool like InDesign.
But before you do that, you want to be sure that your .docx file is in the best shape possible. There are a lot of features in Word working behind the scenes that a lot of writers may not even think about before they upload their book, many of which can make it look wonky on the Amazon side.
First things first, follow this guide to get your MS Word doc ready for publication on Kindle. This will handle a lot of the internal formatting that can mess up your book on e-readers.
Once you’ve finished that, come back here and we will take your finished, KDP-ready document and make a few changes to get it ready for paperback.
If there’s just one thing that’s cookin’ your noodle, feel free to jump to each tutorial, all with videos and step-by-step instructions with images!
1. choosing a trim size in word
2. fonts and line spacing for paperback in word
3. setting margins for paperback in word
4. adding running heads in word
5. adding page numbers in word
choosing a trim size in word
If you didn’t choose a trim size for your book when getting your Kindle version ready, don’t fret! Trim size is the industry lingo for…the size of your book!
The most common trim sizes for your average novel or nonfiction book are 6×9 and 5×8. It’s totally up to you which one you wanna do.
The video below will cover setting your trim size as well as font-size, line height, and paragraph spacing…or feel free to follow along with the screen shots below.
Most likely if you’ve been writing your book in MS Word, your page size defaulted to Letter Size or 8.5″ x 11″. In order to change our paper size, we go to Layout > Size > More Paper Sizes
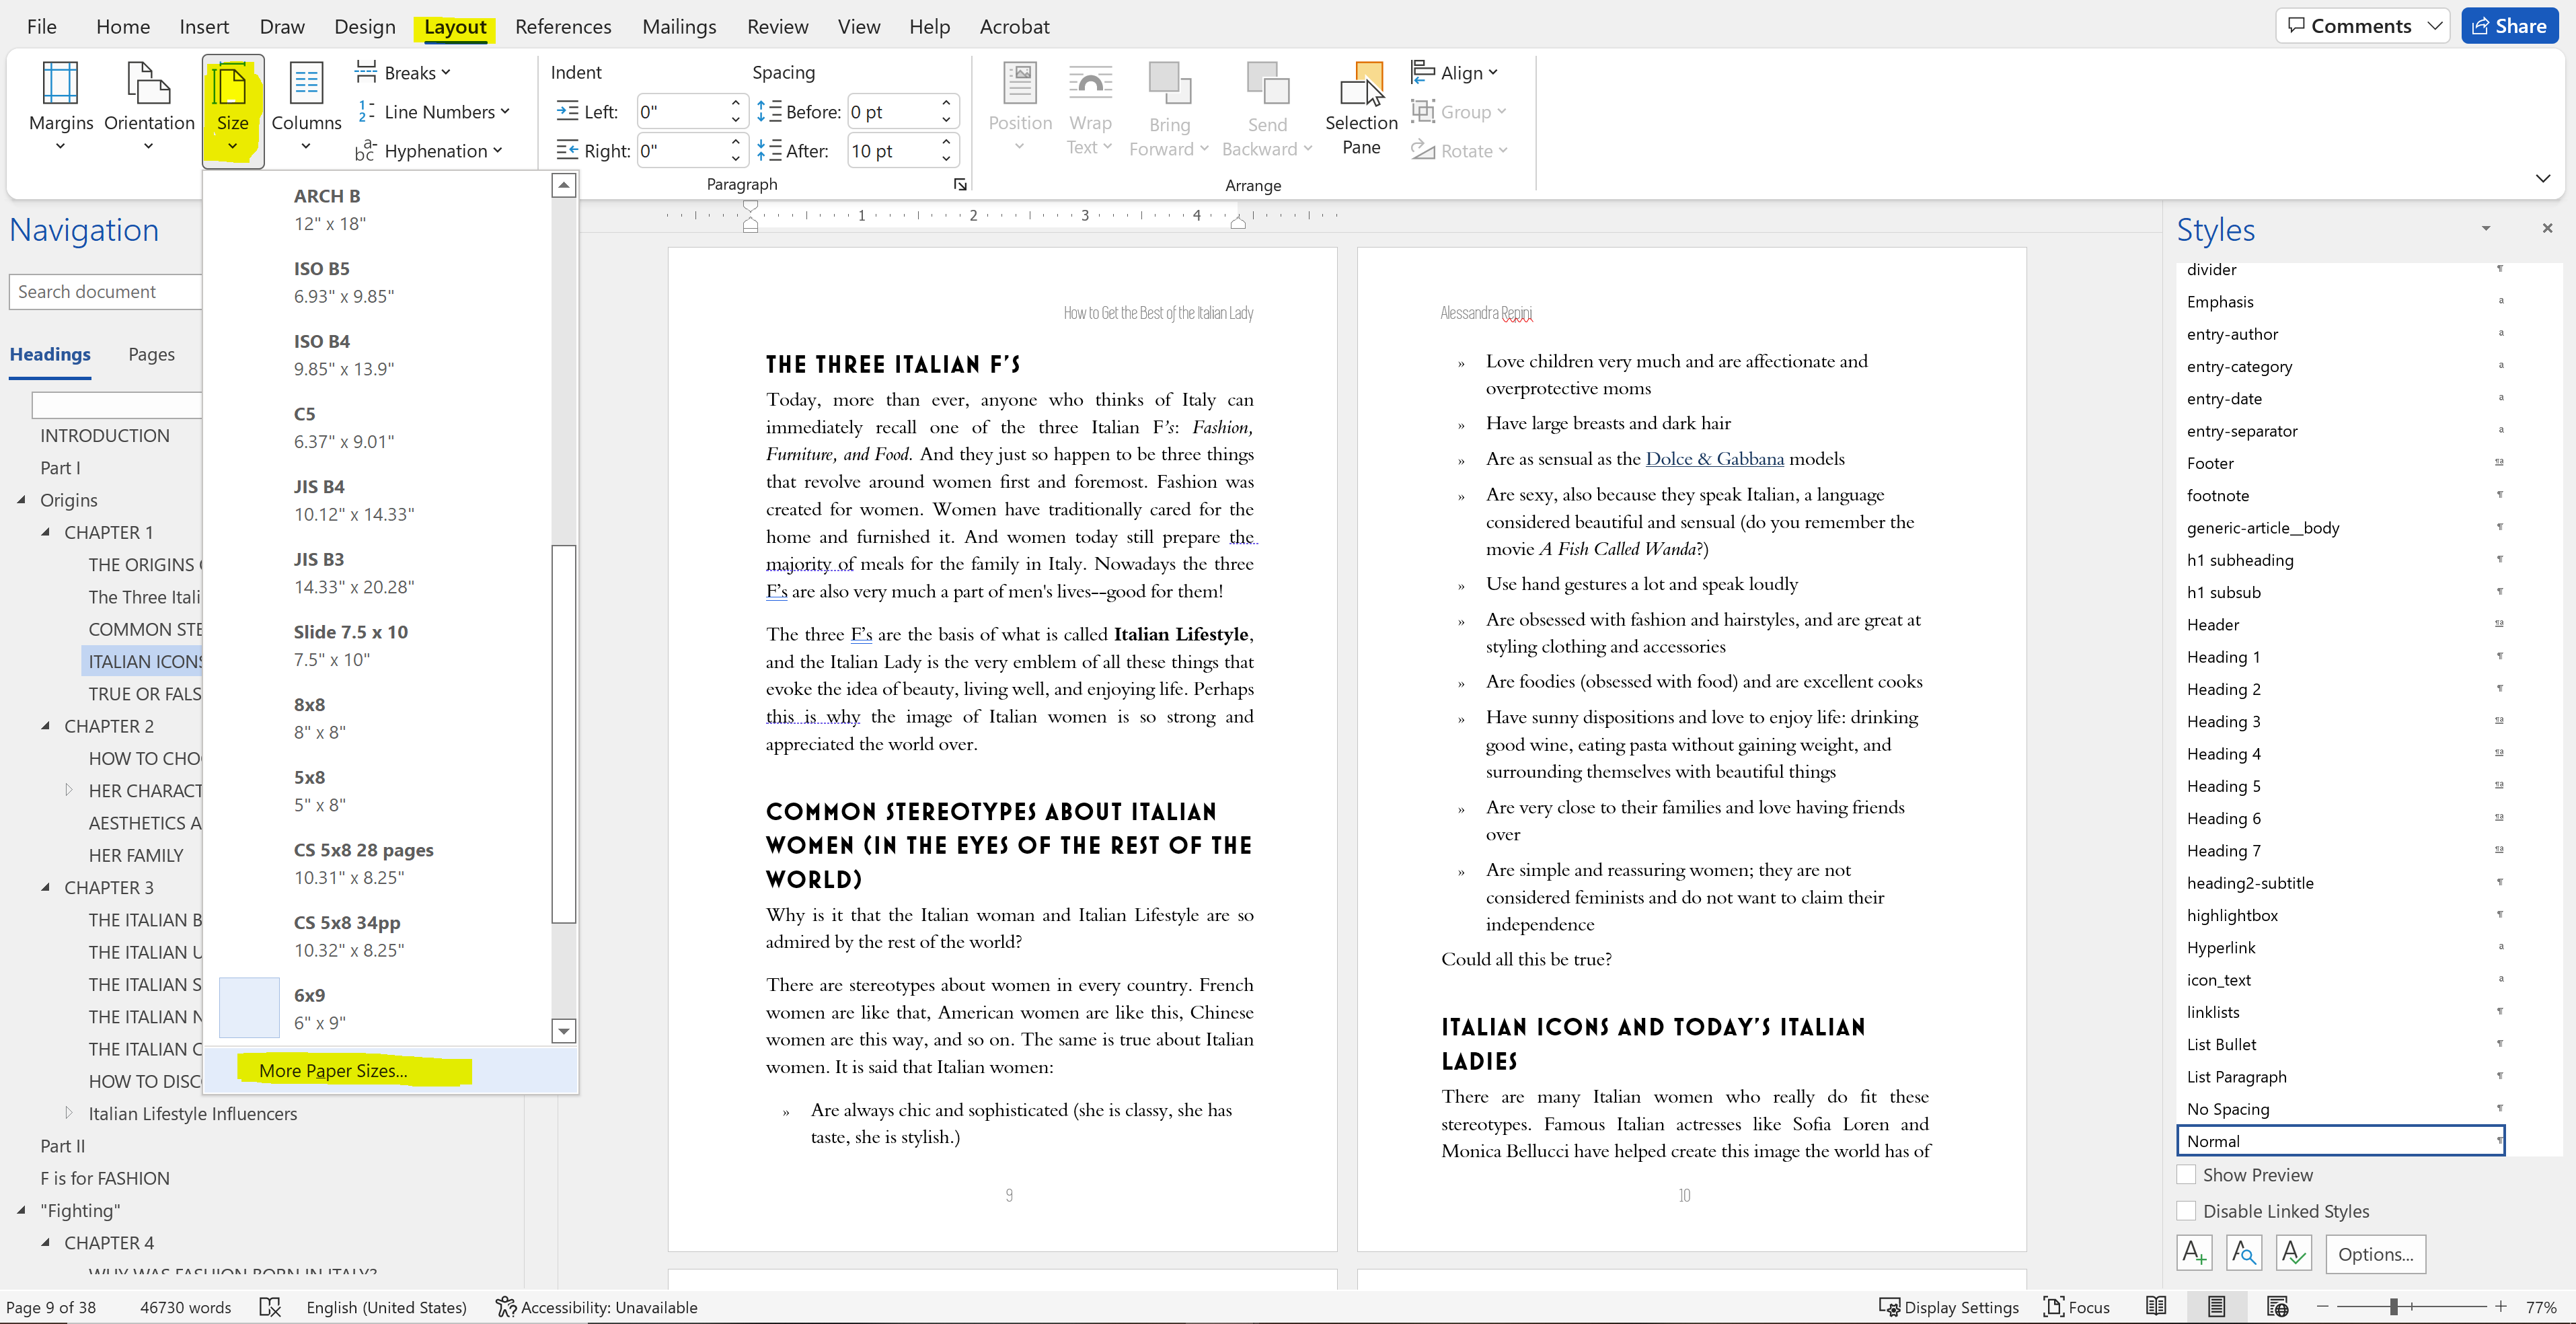
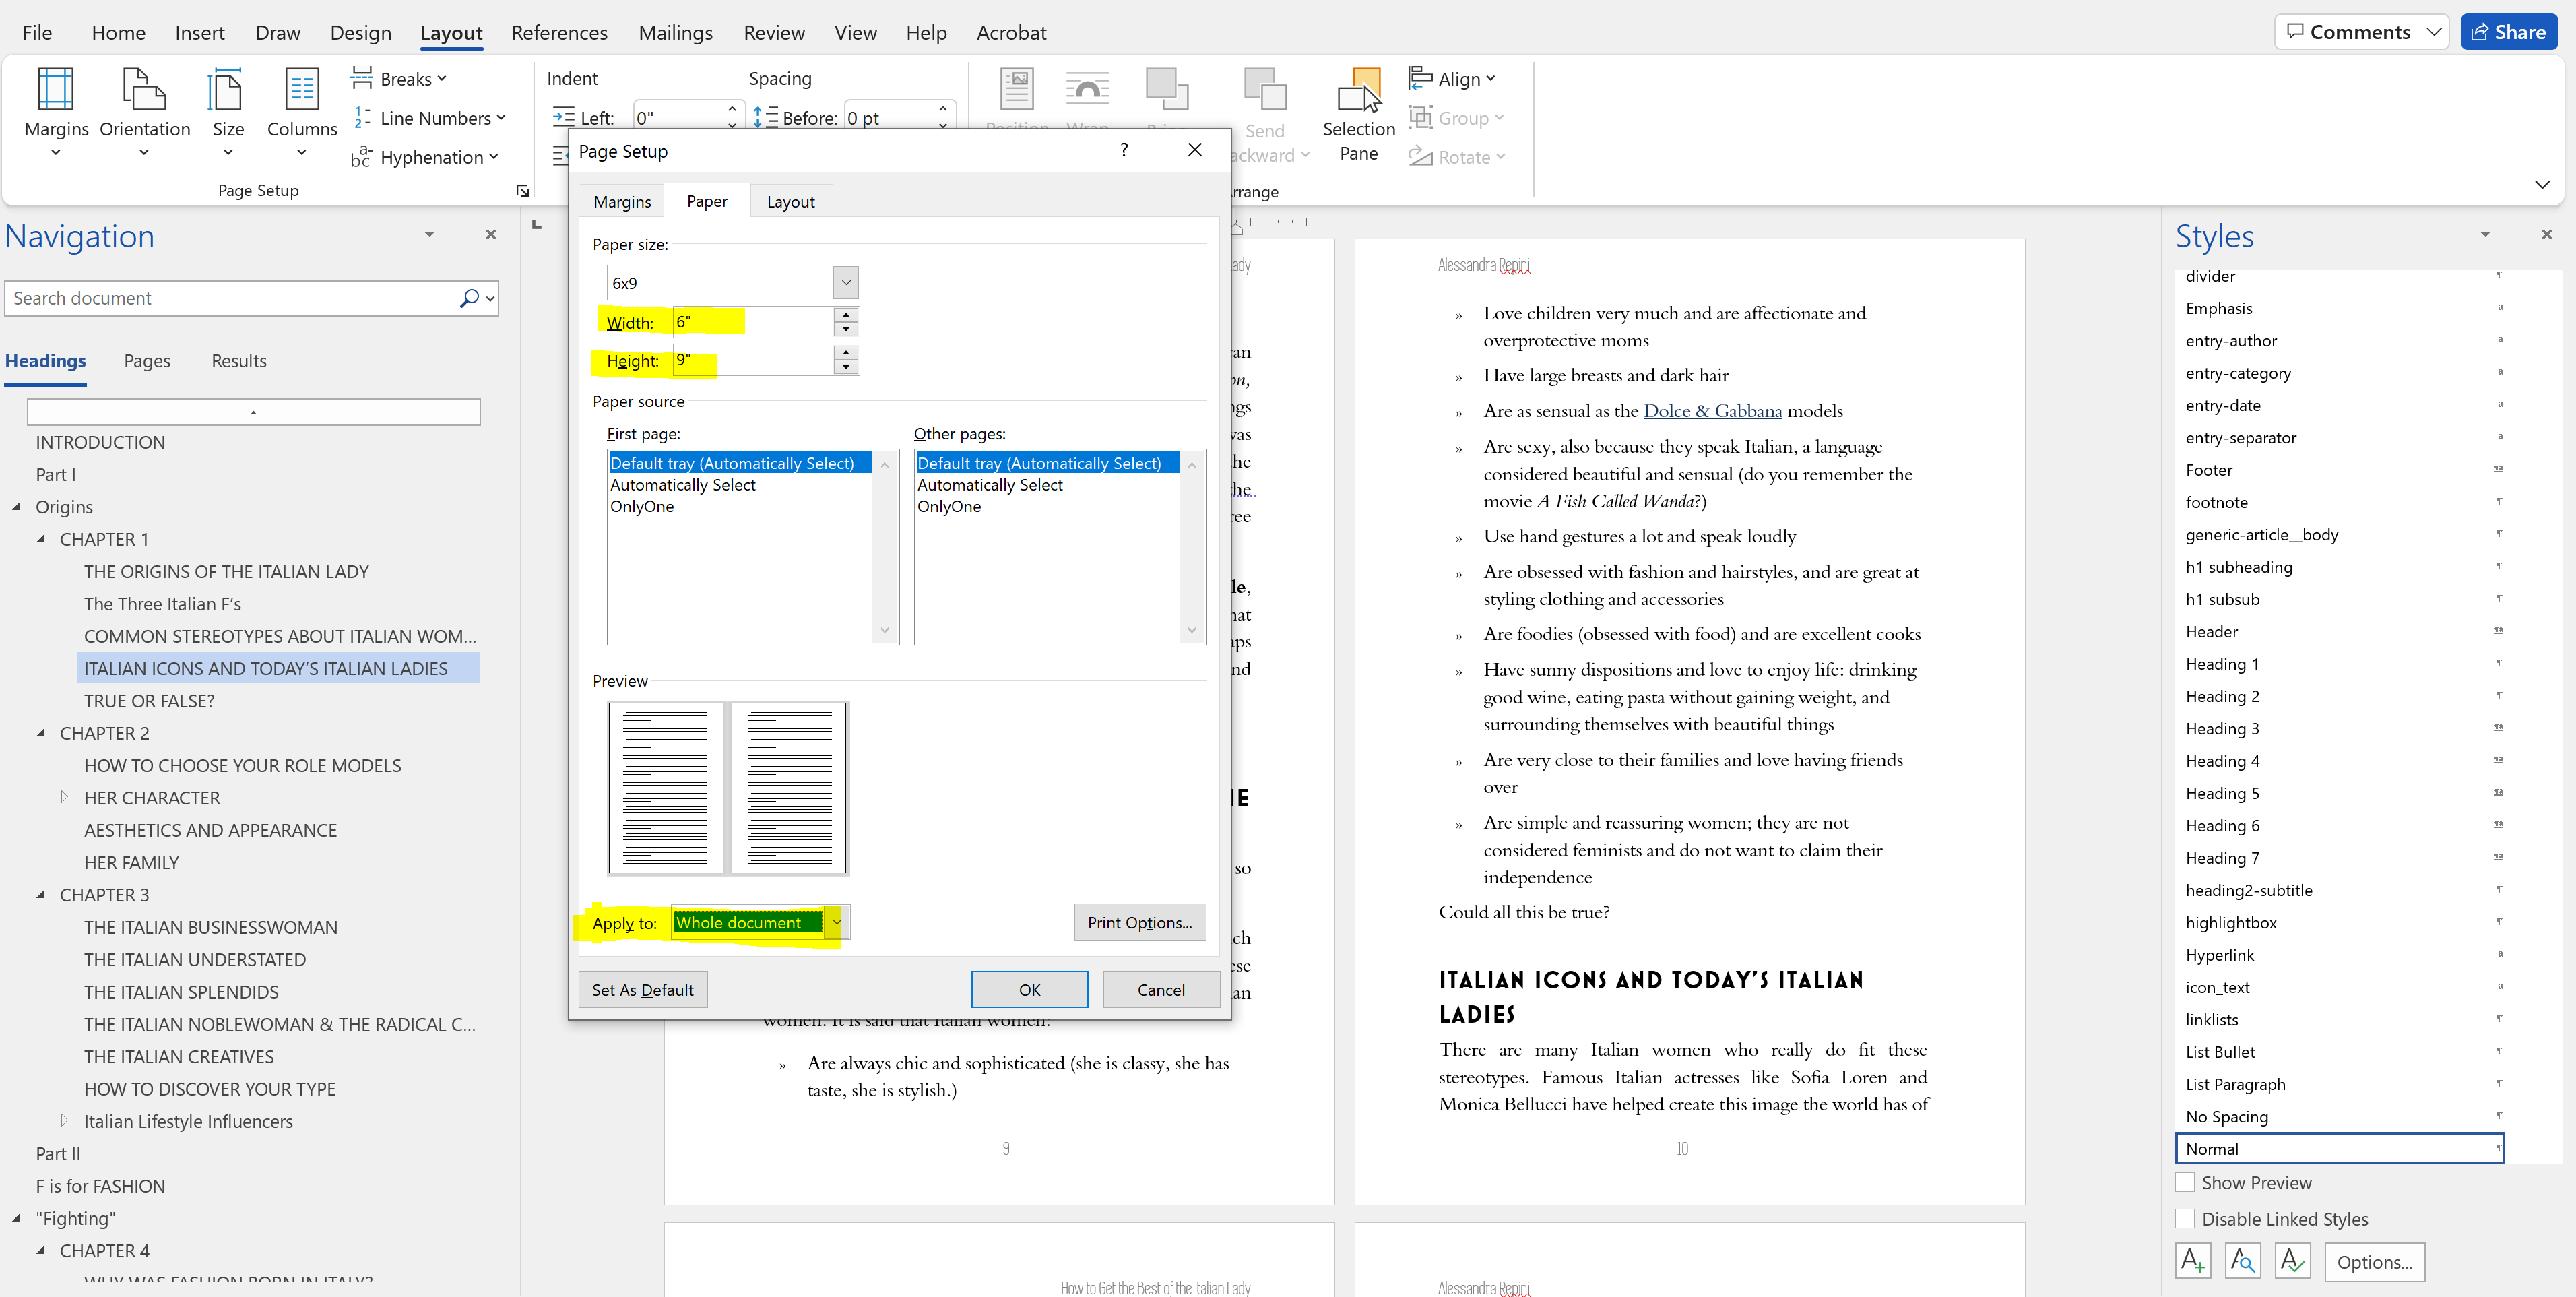
Once we click that, a dialog box will open that lets us set the trim size to 6×9 or 5×8, whichever you want.
BEFORE you change your paper size, be sure to go to the bottom of the box and click “Apply to: Whole Document.” Otherwise you will only be changing some of your pages, and this is a surprisingly common rejection error when people upload their books!
fonts and line spacing for paperback in word
One of the most basic pieces of publishing a professional-quality book in paperback is choosing a high-quality font and getting your line spacing right. You don’t want the words too crowded, nor do you want giant spaces between every line!
You can check out this post on my favorite fonts for paperback books, and then we can get started with our formatting!
The video above ALSO covers font size and line spacing so check it out if you have any questions.
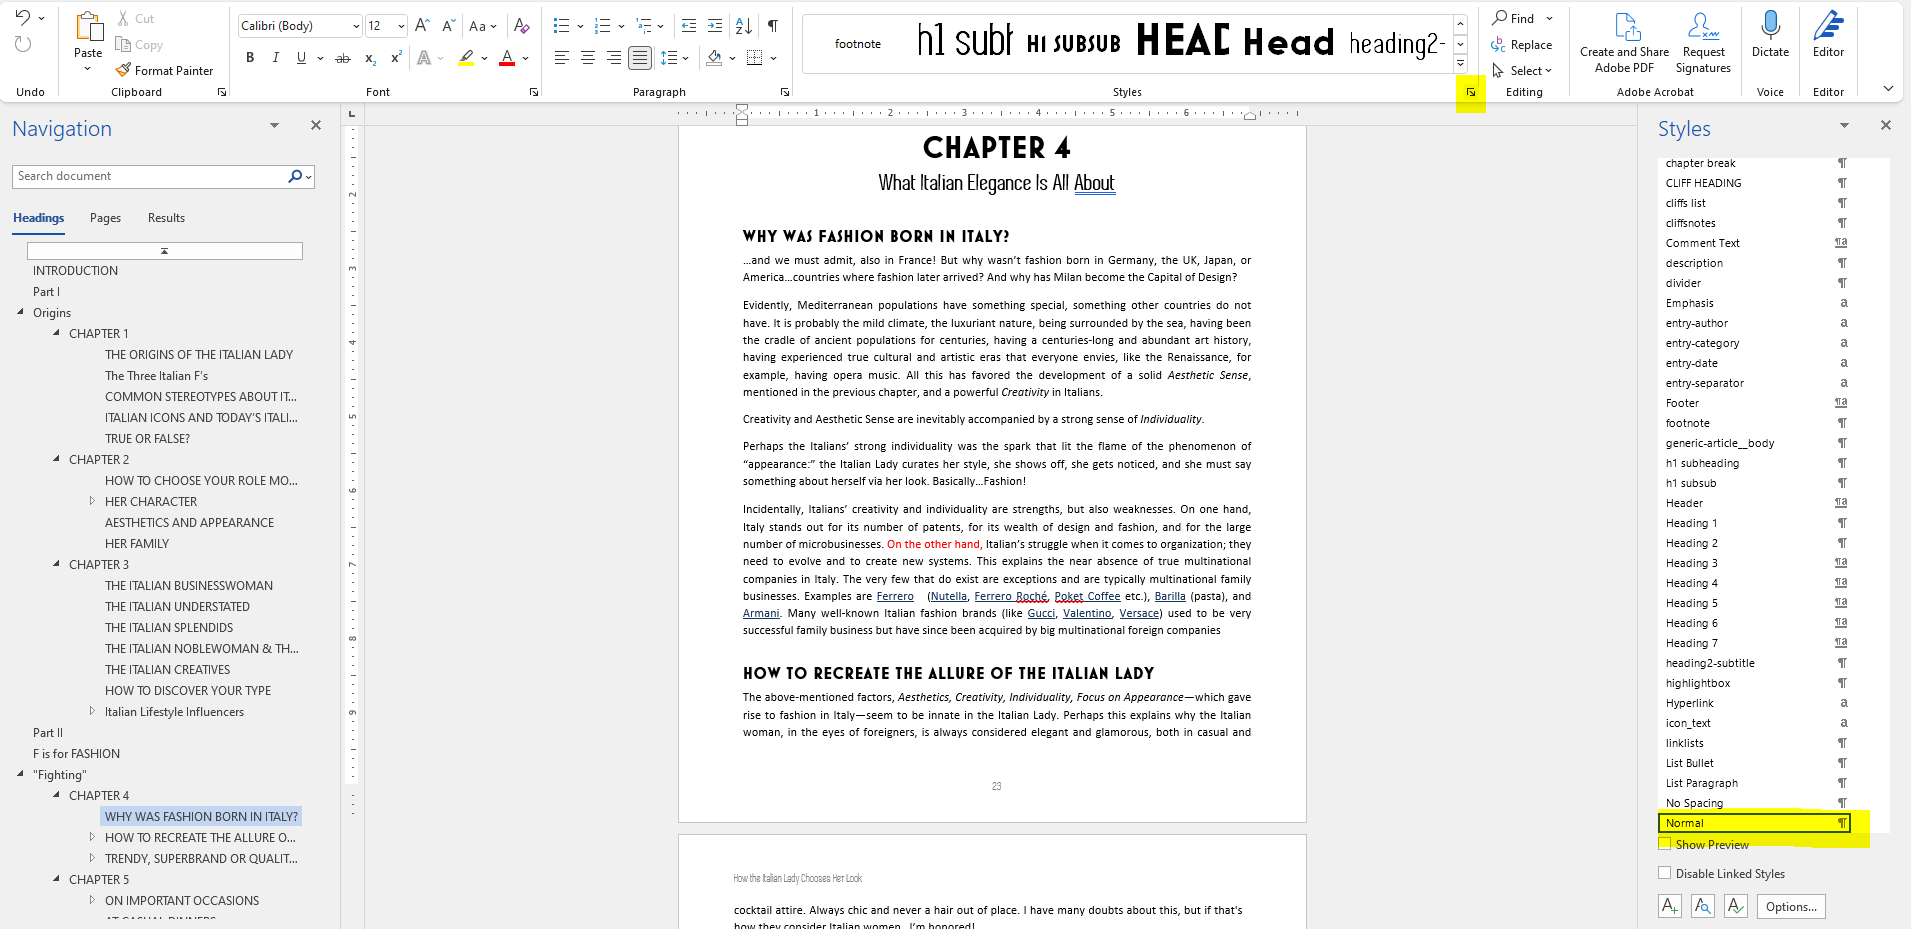
Hopefully if you followed the instructions for formatting your book for Kindle, all of your body text is set to the same paragraph style. This defaults to “Normal” in MS Word, so let’s check and see what it’s set at now.
At your top ribbon, hit “Home” and then click the little arrow to pop out your “Styles” box. Put the cursor in your body text and you will see it highlight the current style.
Next we want to right click on that and choose “Modify.”
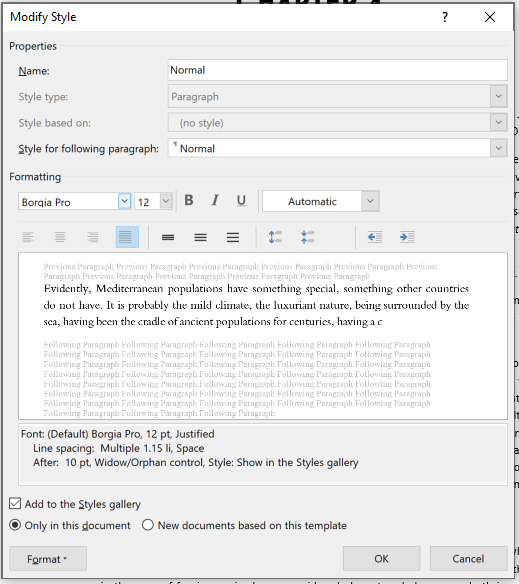
You can choose your font name in the box. In this case I chose Borgia Pro, 12pt. And then we need to click on “Format” at the bottom left and choose “Paragraph” to set the line spacing.
Select “Multiple” and then set it to 1.2 or 1.15 or 1.25. See which looks best for you and the font you’ve chosen.
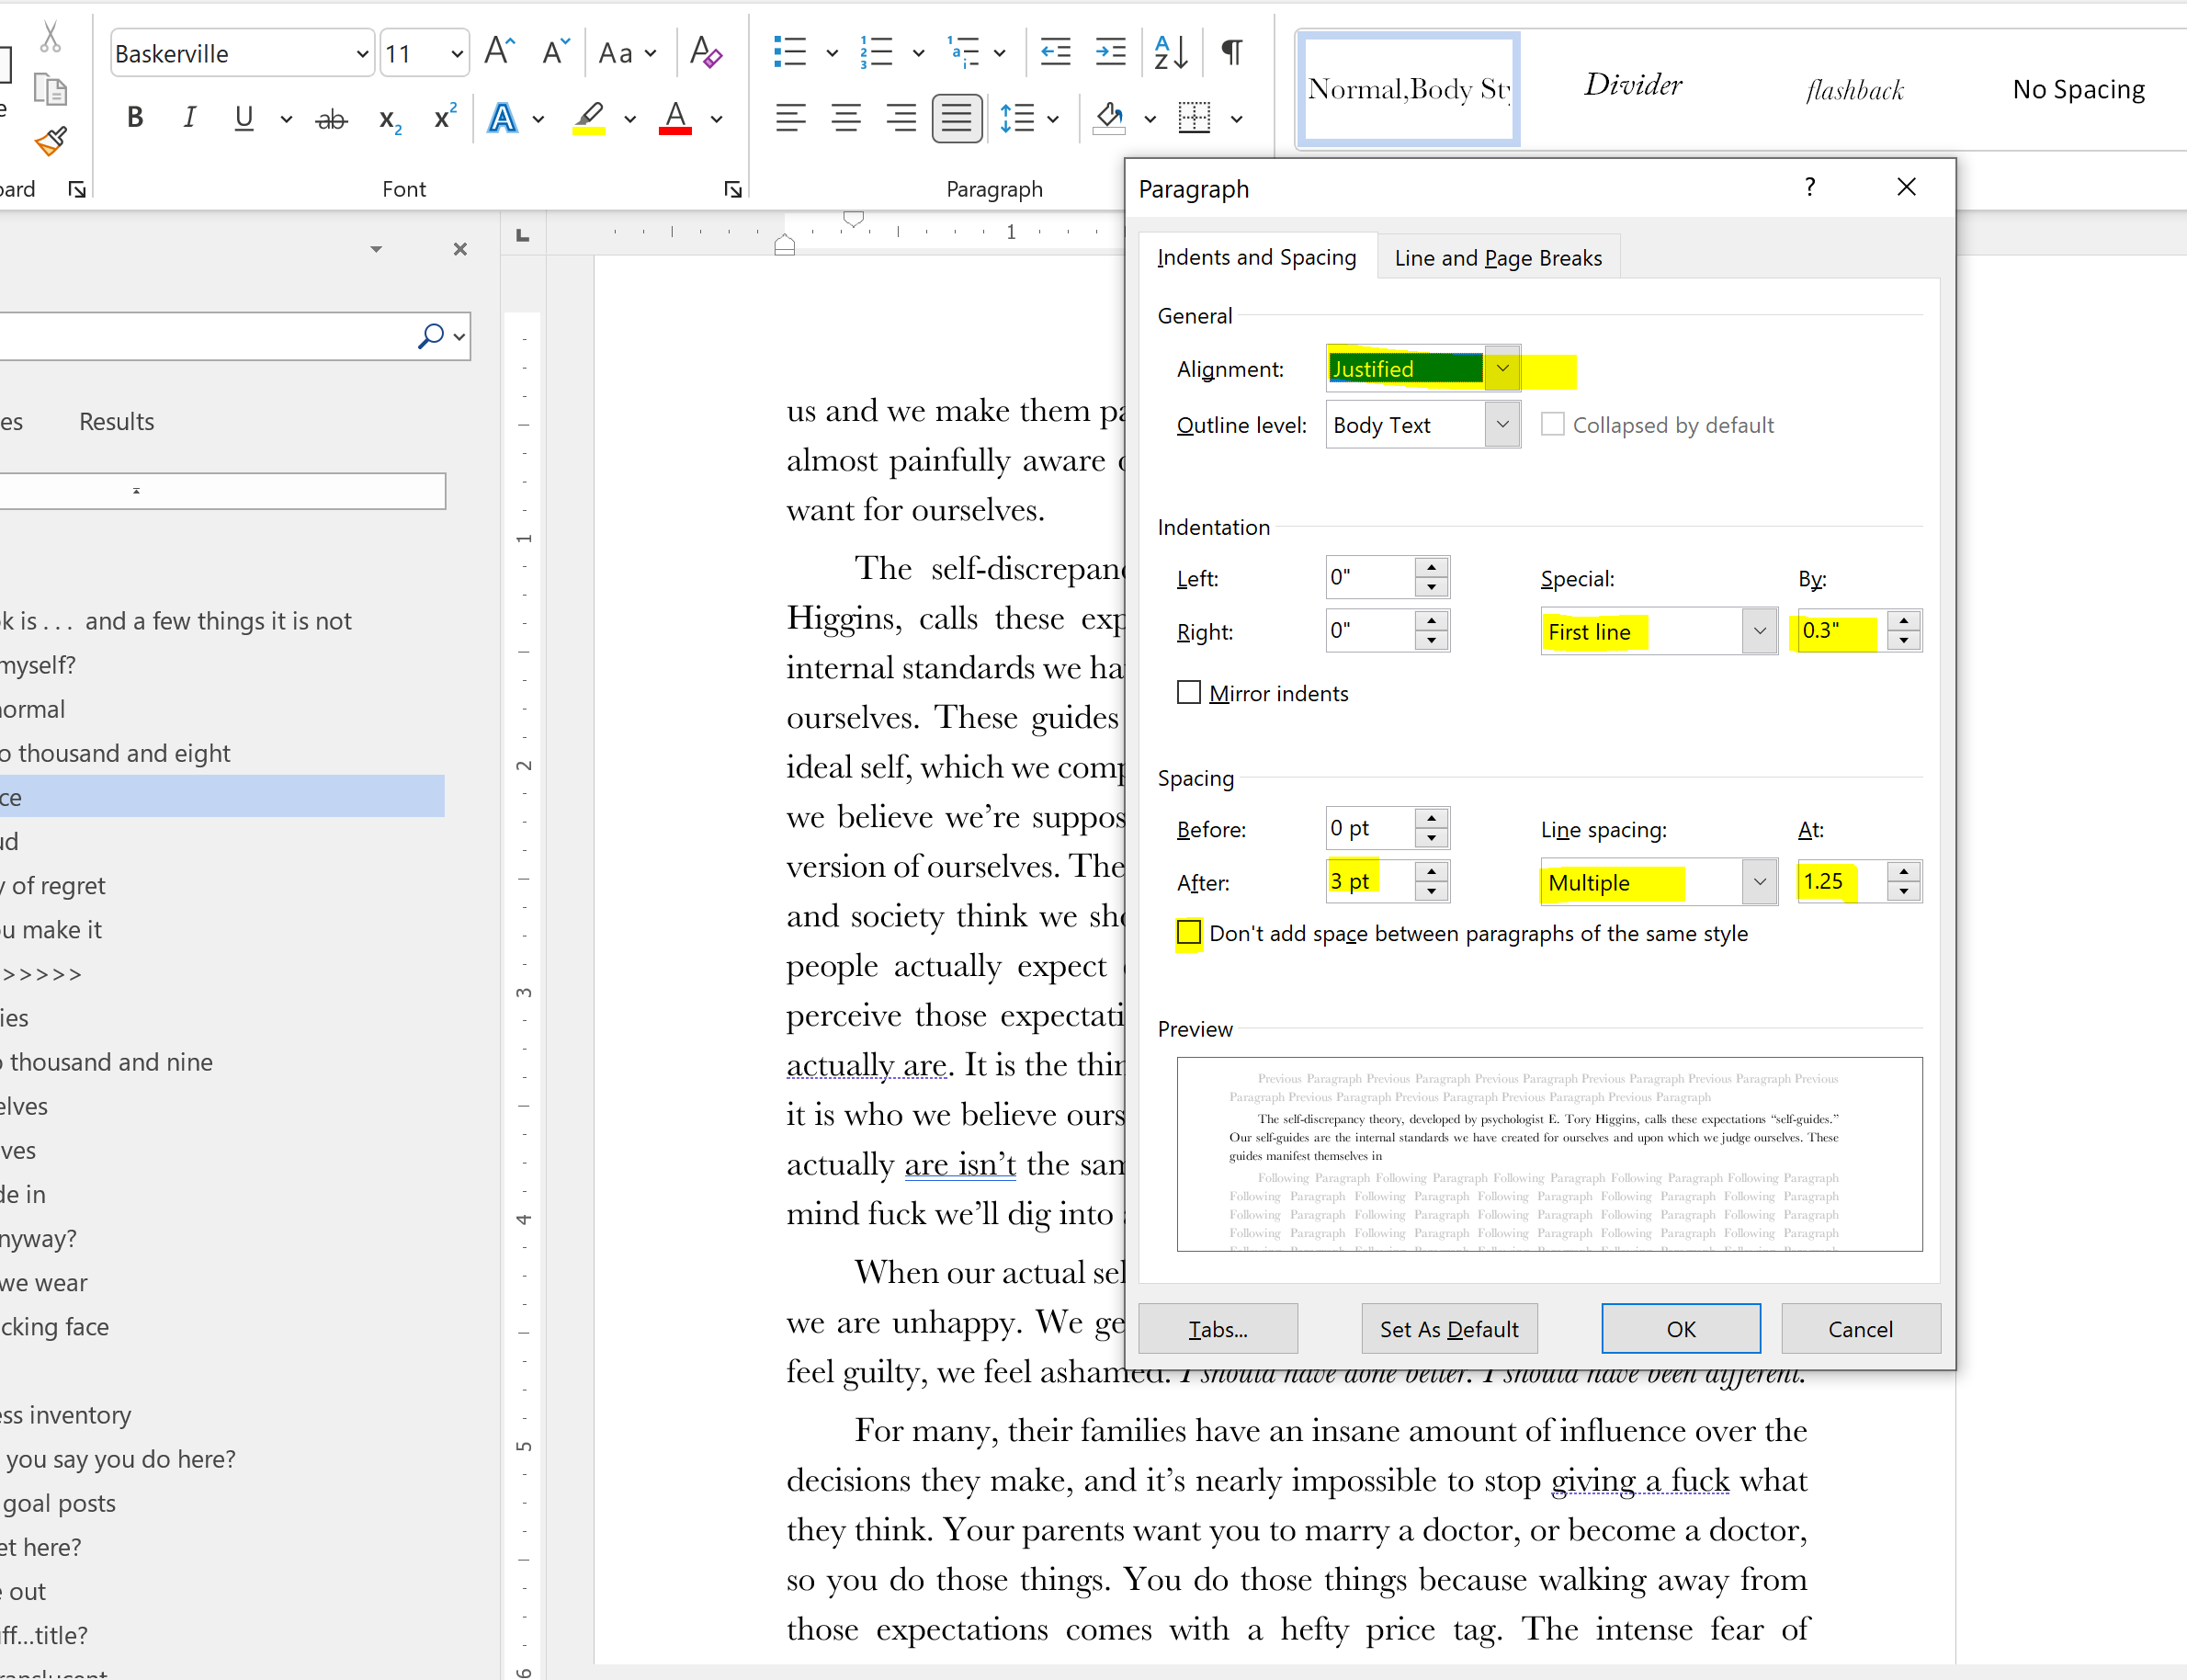
Also make sure you choose “Justified” for your alignment and that “Don’t add space between paragraphs of the same style” is UNchecked.
Once you do that, you’re well on your way to having an Amazon-ready paperback!
setting margins for paperback in word
One of the classic rookie mistakes in uploading a Word doc for Amazon paperback is that new authors don’t make big enough gutters. The gutter is the interior margin where text can get lost in a physical book.
You want this gutter to be larger than your outside and top and bottom margins to make it easy for the reader to see the text near the center of the page.
In MS Word, go to Layout up at the top and click the little arrow to open the dialog box.

Make sure you have it set to “Apply to: Whole document” and not just “This Section” or your margins will be changing partway through your book!
In this particular example, I’m using very small margins to keep the page count as low as possible–these are summary books so keeping publishing costs down was of the utmost importance. For your full-length novel, you’re going to want larger margins for a more professional look. Saving a few pennies here won’t be worth the worse experience for the reader.
As a good rule of thumb, you can start with gutter margins of 0.875″ and outside margins of 0.75″ for an average 200-page novel on 6×9 paper. You can find a good discussion on book margins at The Book Designer here.
For our top and bottom margins, that will depend on our running heads and page numbers, which we’ll get to in a minute.
adding running heads in word
One easy thing to make your paperback book look infinitely more professional is to add running heads to the top of every page. You can decide whether you want these to be the author name and book title, or if you want to have the book title and chapter title, or author name and chapter title…the choice is up to you!
You can check out the video below to walk you through it, or just follow the step-by-step tutorial!
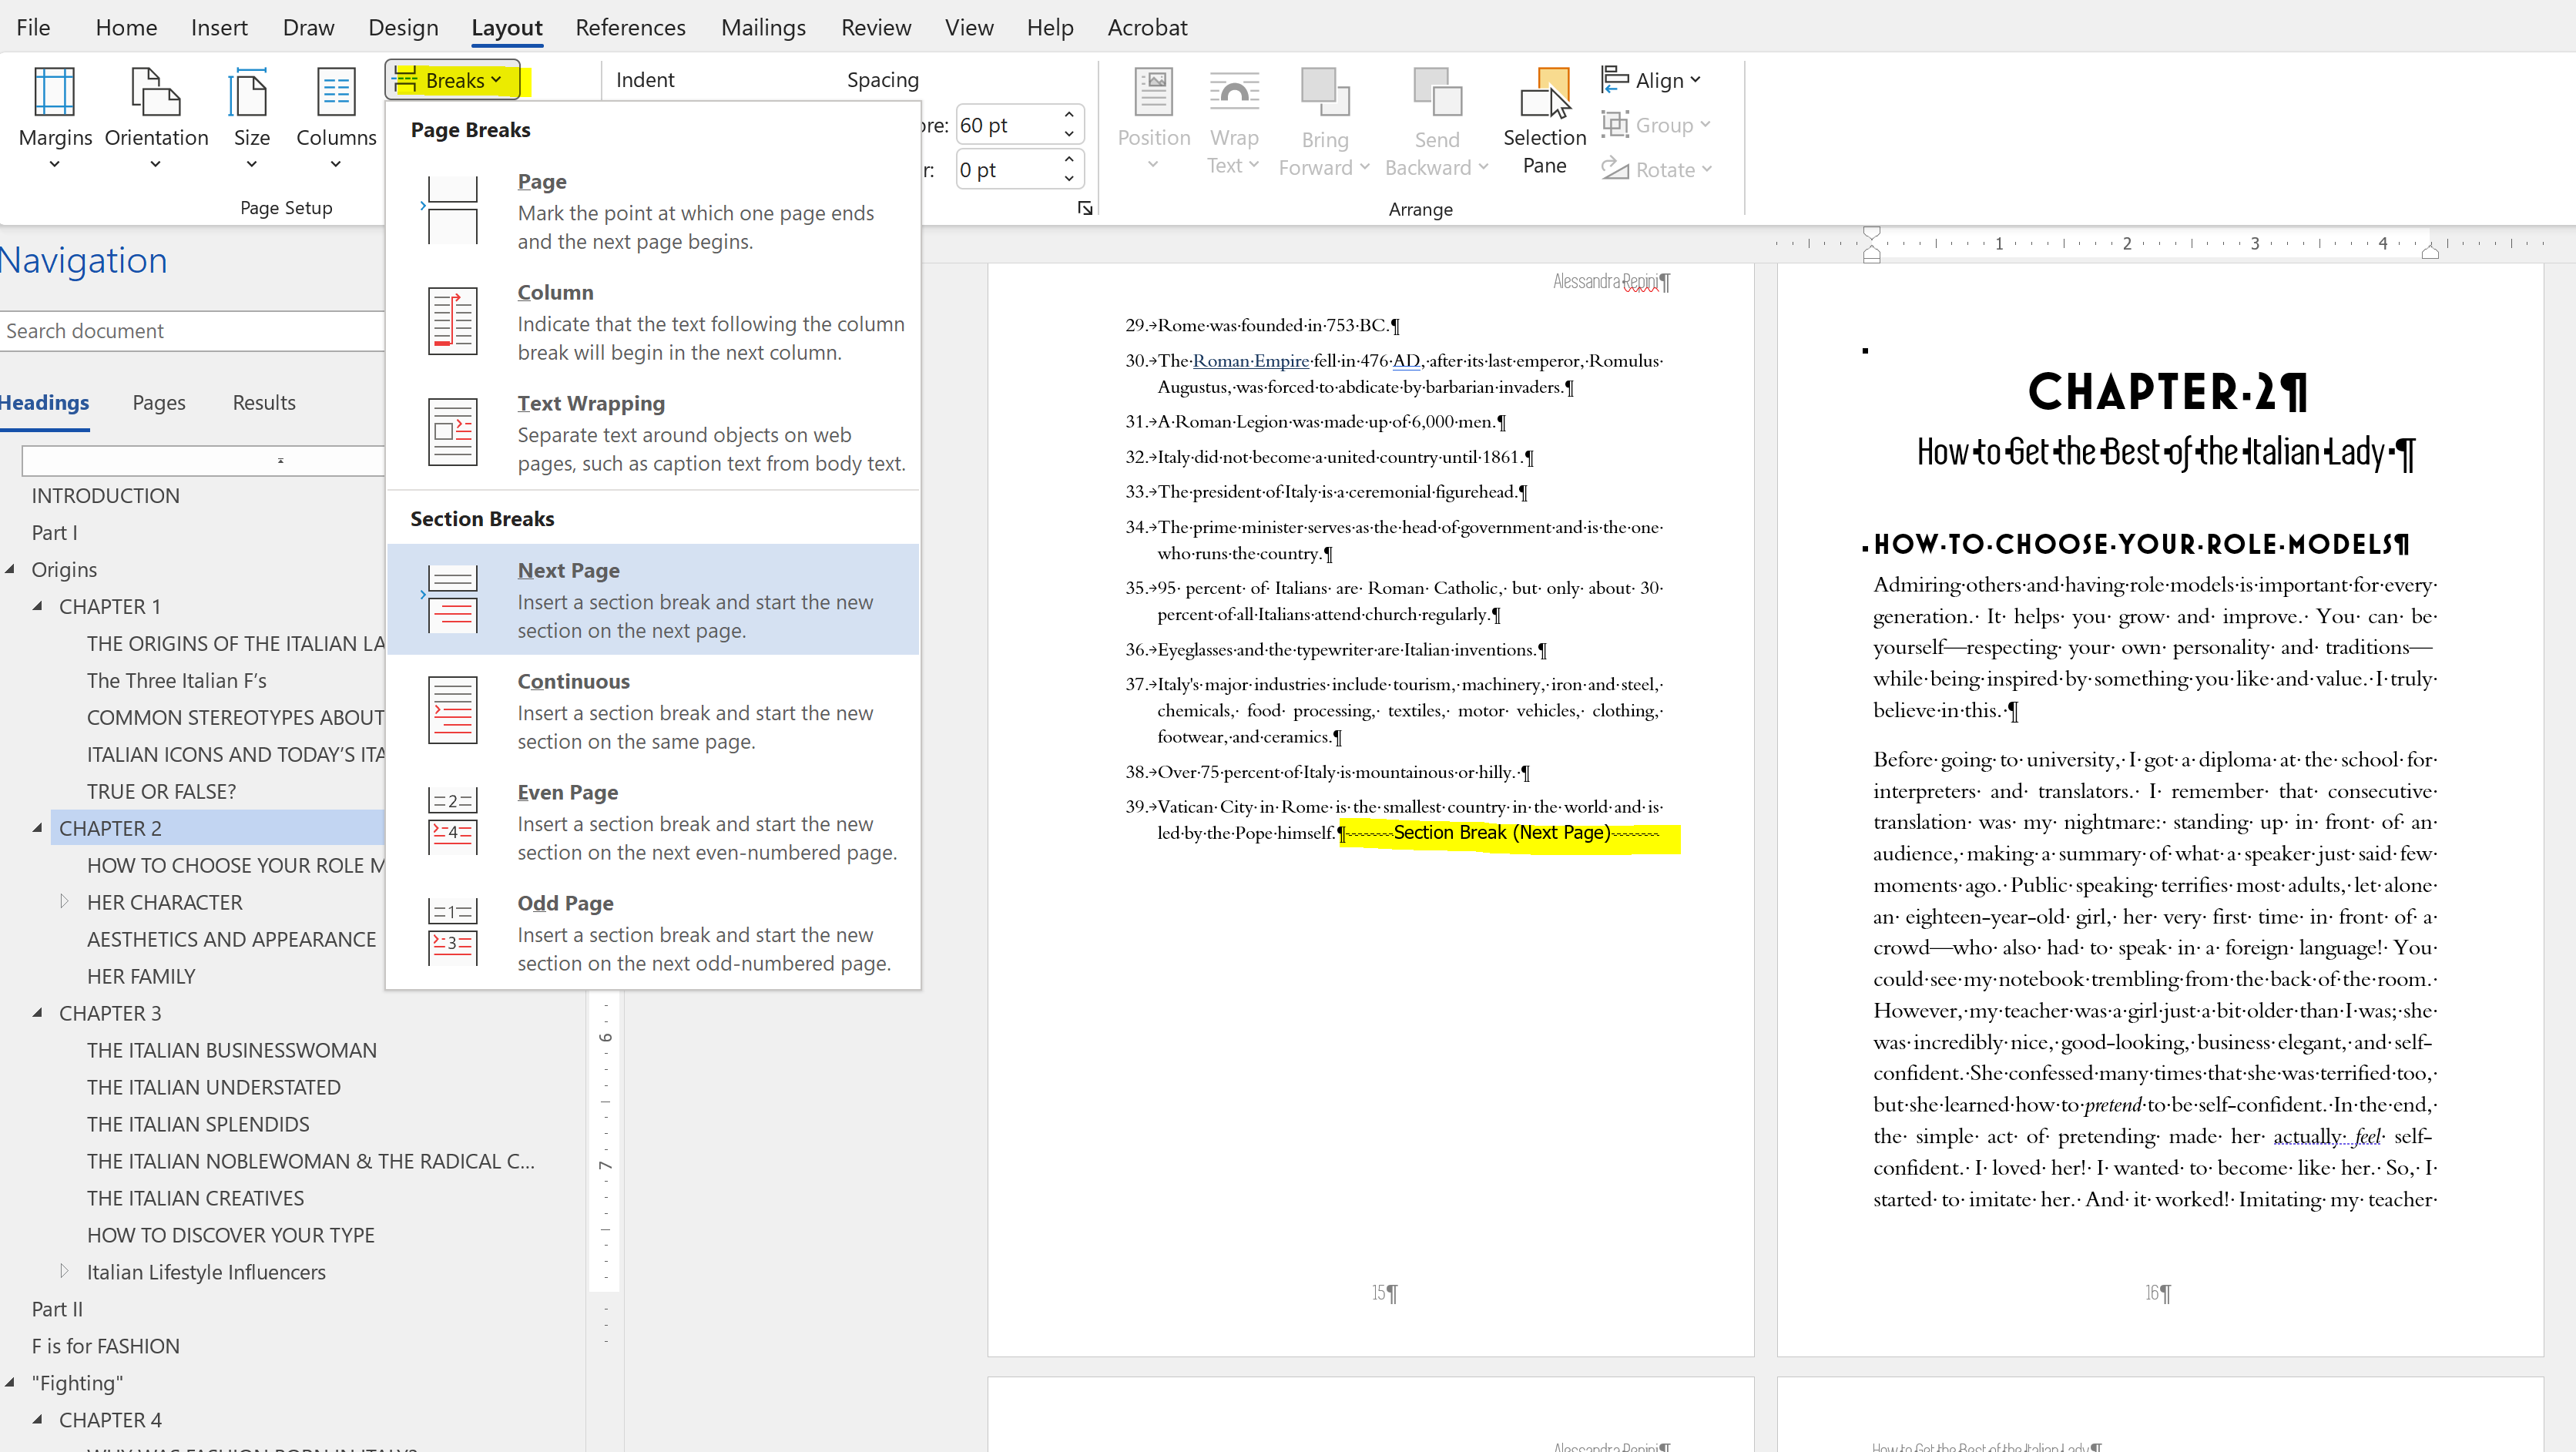
In order to make this work properly, first you’ll need to make sure you’re using section breaks instead of page breaks between each of your chapters. You can add your section breaks by going to Layout > Breaks > Section Breaks > Next Page:
Once you have that done, you’re ready to start adding your running heads!
When you double click the top of any page, it will open up the settings for headers and footers. Make sure you’re at the start of a chapter, and you want to click “Different first page” and “Different odd and even pages” at the top. You NEVER want your heads to show up at the beginning of a chapter or section.
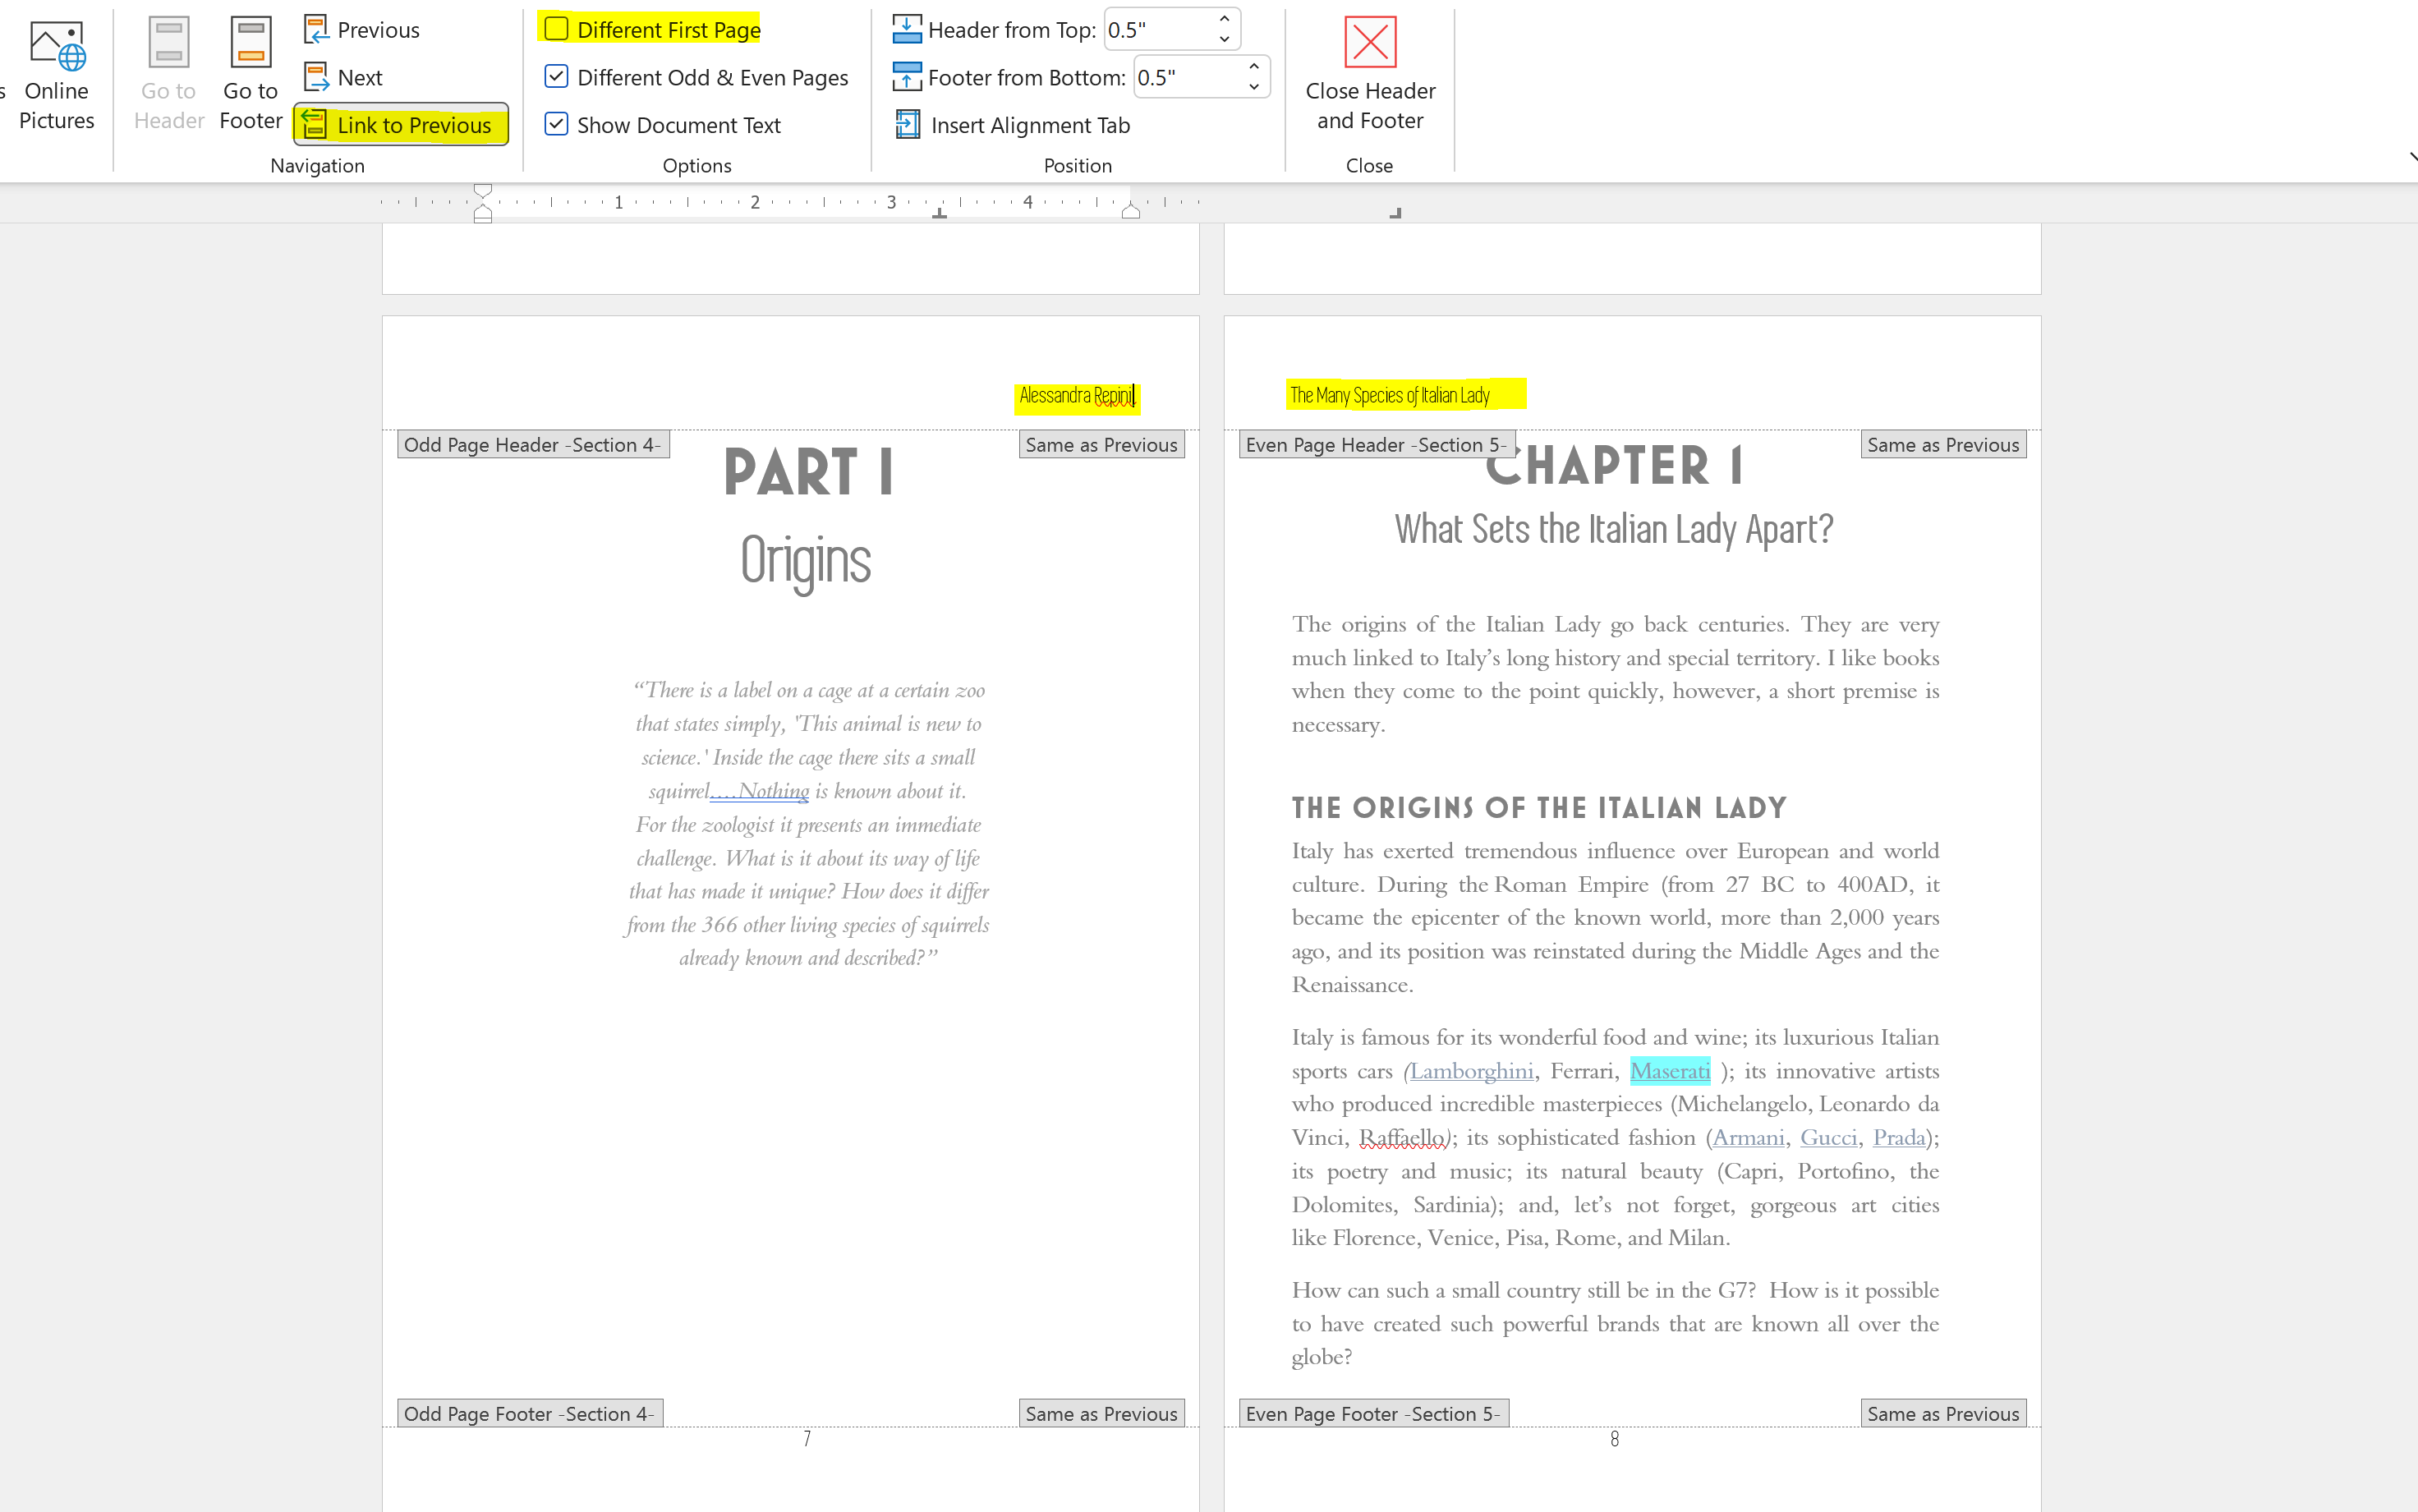
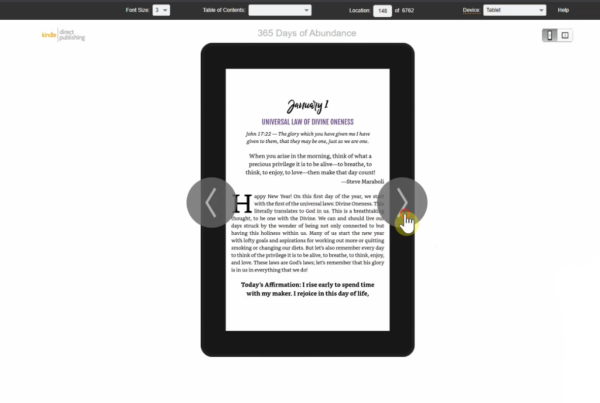
Word also has a very wonky feature where the pages are flipped in editing mode versus how they will actually look in your book. Hit Ctrl+P at any time to jump into print preview and you will see the headers you’ve added are showing up on the opposite page of your spread! So when you’re adding them in editing mode, you need to do it backwards!
If you’re using chapter or section titles as your running head, you’ll need to go through each section individually making sure that “Link to Previous” is OFF. Double check that the correct text is showing up on each chapter, and there you go!
For page numbers, the process is pretty much the same, except you’re adding it to the footer instead of the header.
adding page numbers in word
While running heads may be optional, page numbers in a paperback book most certainly are not. The process is very similar to adding running heads, however. Especially when it comes to starting new sections and linking to previous. But just in case you need another boring video of me doing things in Microsoft Word…here ya go!
To get started, double click in the footer of your book, which will automatically move your top ribbon to the “Headers & Footers” option. You can go over to the “Page Number” option > “Bottom of Page” and a drop-down menu will show your choices.
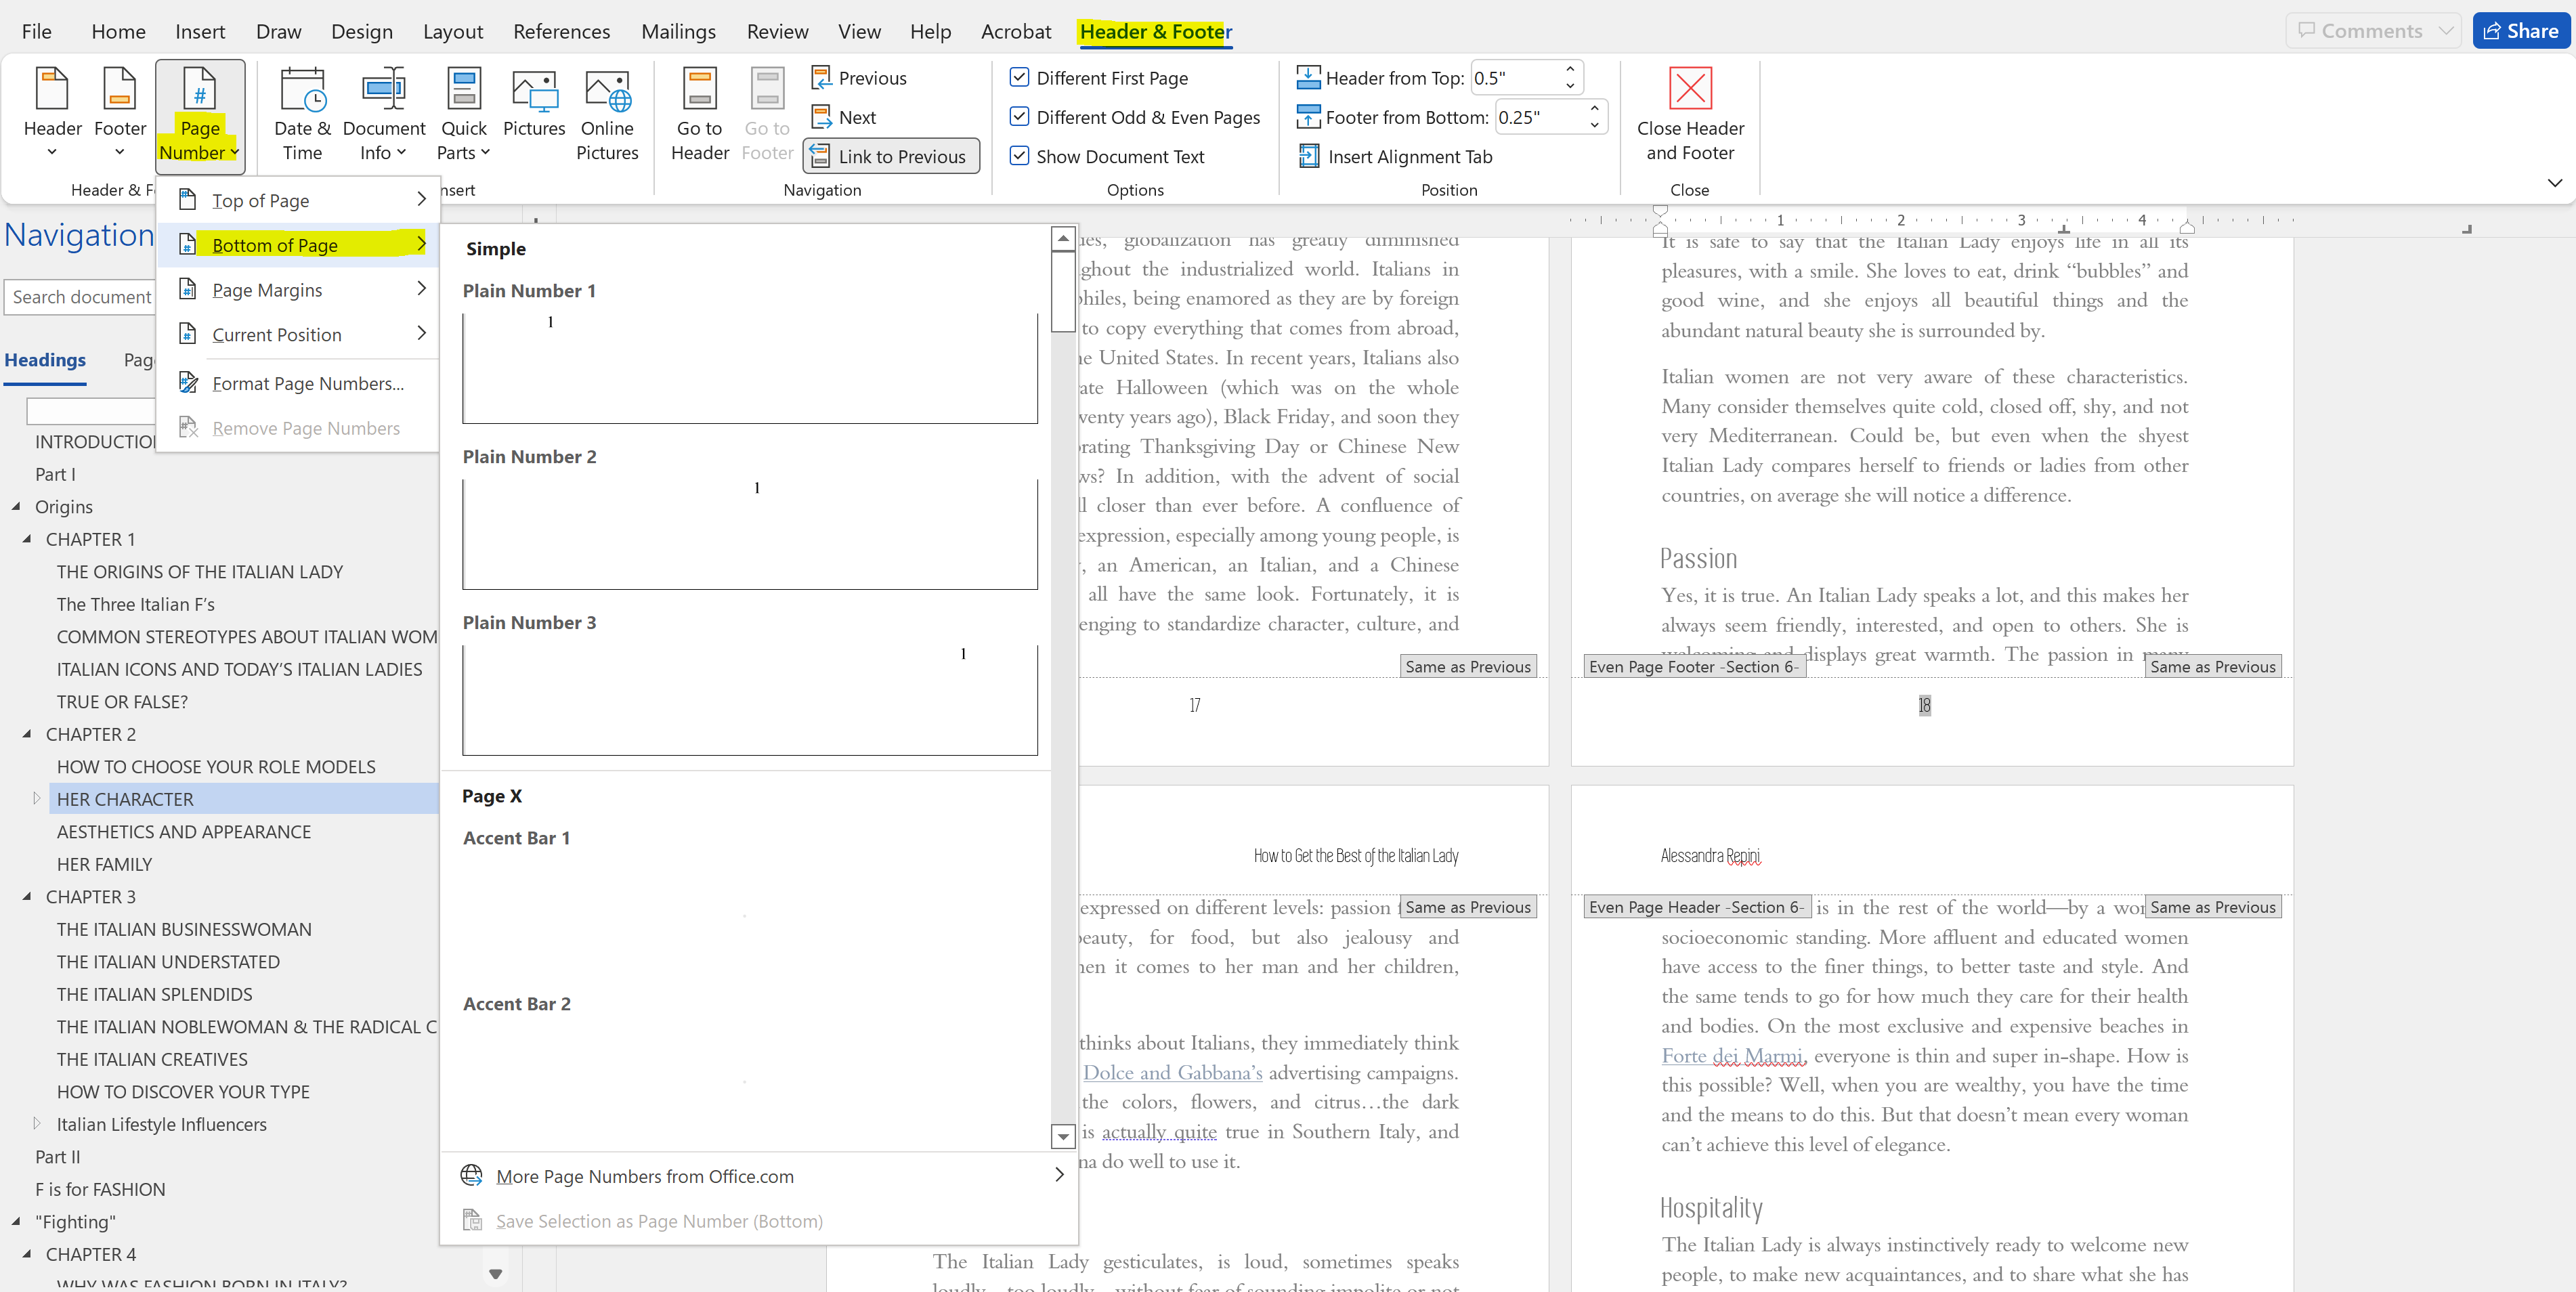
VERY IMPORTANT: Book layouts are displayed backwards in Word editing mode. So the page you see on the left will actually be on the right side of the book, and vice versa. In order to get page numbers to appear on the outside of every page, you should choose the inside version. I know, very stupid.
Make sure to check “Different even and odd pages” if you want numbers in the corners rather than the center.
Industry conventions dictate that the first page of a section does not have a page number. However, if it’s the first page of a chapter and there is regular text on the page, you can keep the page number if you want. You control this by choosing “Different First Page”
Once you’ve gone through section by section, hit CTRL+P to and go through page-by-page once more to make sure that Word didn’t secretly delete or change the placement of your page numbers. This can happen a lot with the link to previous setting, so it’s always necessary to check before printing!
converting word to pdf
Once your book looks just the way you want it, your very last step is to export or print to PDF to upload to Amazon! Huzzah! Check out this post on how to convert word to PDF for Amazon if you need a little help with the final step!