how to format your MS word doc for KDP
While I totally don’t recommend doing this, and recommend using Calibre to convert your file to .epub instead, if your book format is very simple and you don’t care about details like your interior title page image, you can 100% upload Microsoft Word docs to the KDP backend. It will do the conversion into e-reader format for you.
But before you do that, you want to be sure that your .docx file is in the best shape possible. There are a lot of features in Word working behind the scenes that a lot of writers may not even think about before they upload their book, many of which can make it look wonky on the Amazon side. So let’s take a look at a Word doc:
Page Breaks and Paragraphs MS Word to KDP
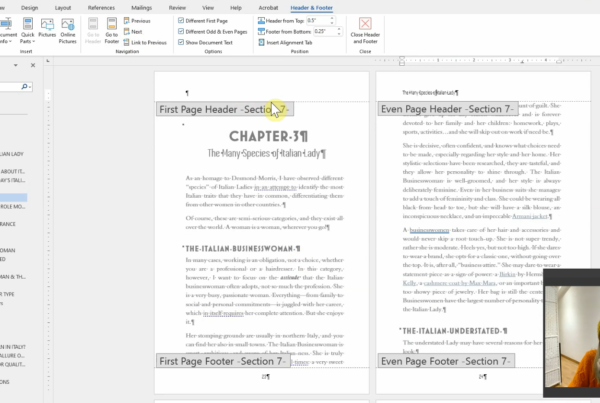
Looks pretty normal, right? But in order to see a lot of the HTML markup that is working behind the scenes, we need to turn on the ¶ function.
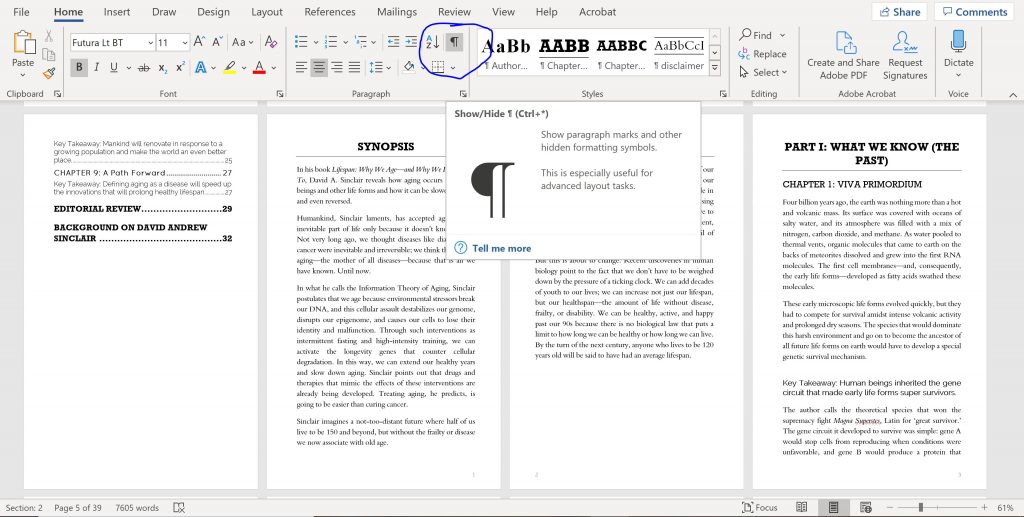
This will show you all of the paragraph markings, page breaks, section breaks, and everything else that is going on behind the scenes telling your document what to do. What many people don’t realize, is that hitting the “Enter” button a bunch of times is NOT how you get to a new page in Word. You need to insert a page break. For KDP, as font sizes and screen sizes are changeable, a bunch of paragraph marks will mean MASSIVE blank spaces in your book.
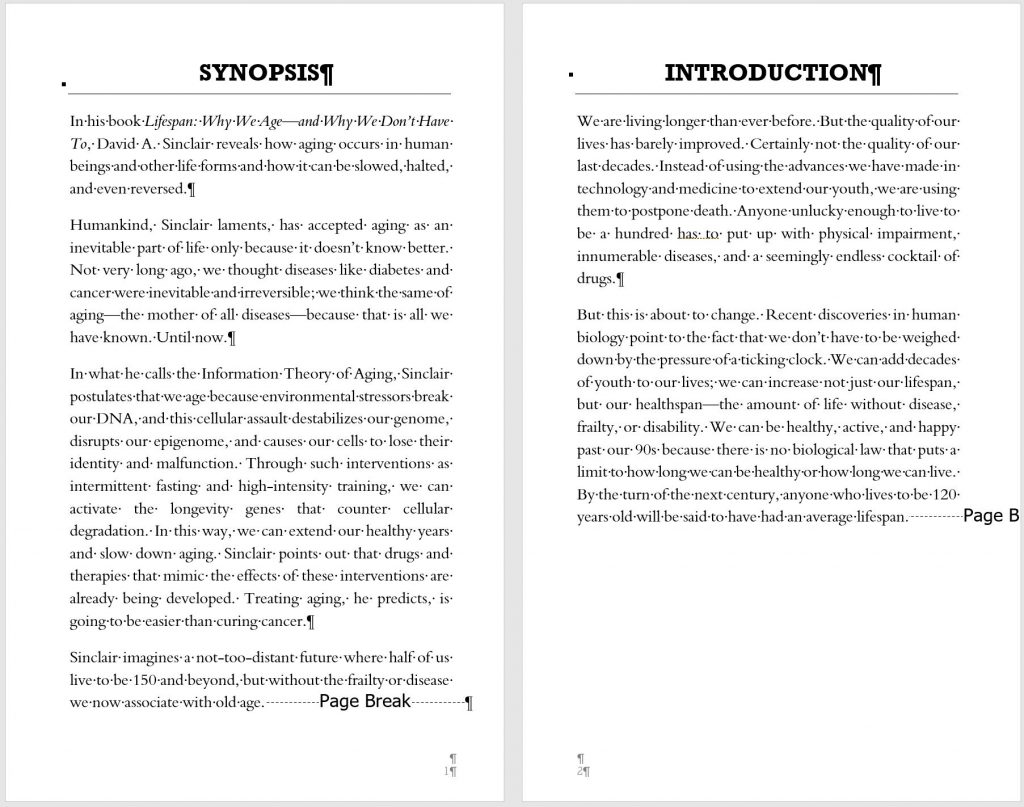
Here is an image of what proper page breaks should look like:
And HERE is an image of what NOT to do:
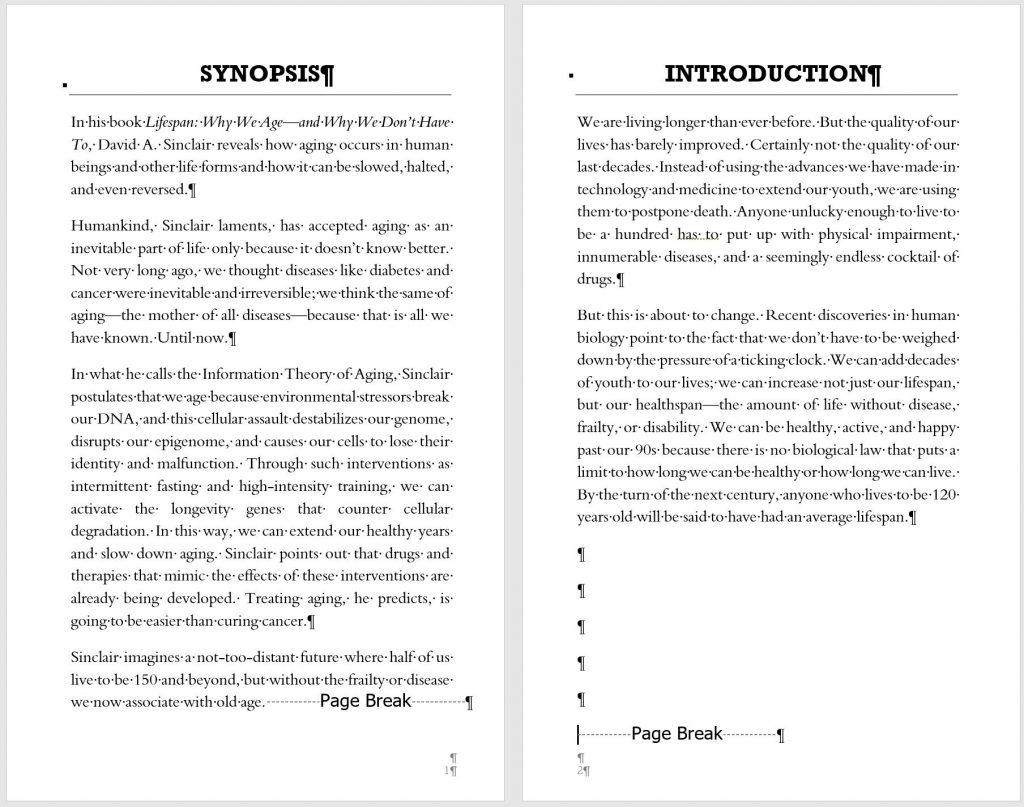
It’s also very important to note that your page breaks MUST be in the same paragraph as your final paragraph of text. Page breaks naturally insert themselves in a NEW paragraph, which can render a fully blank page on a kindle if your paragraph happens to fall at the very end of a page, like this:
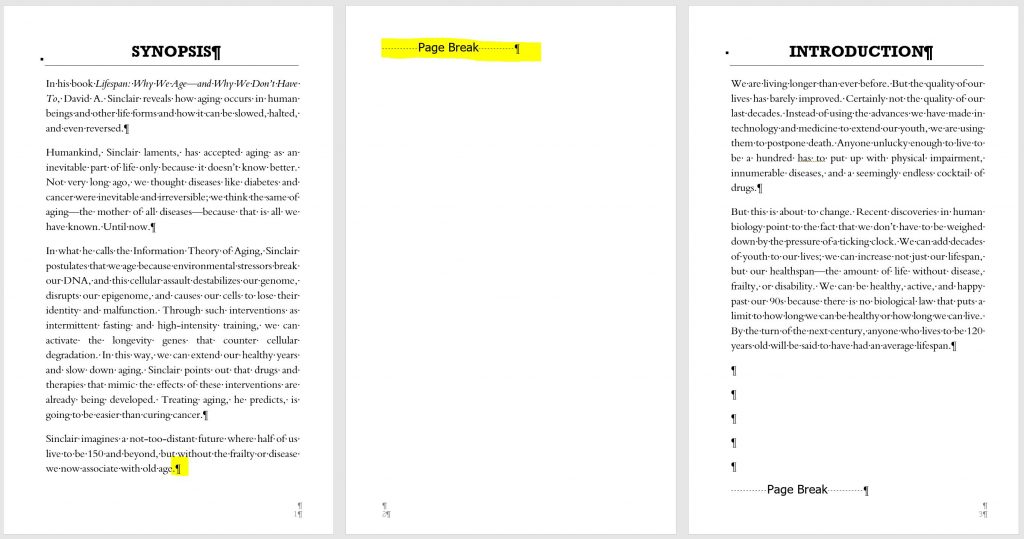
So make sure after you put in your page break (CTRL + Enter), that you delete the paragraph mark nestled at the end of the previous paragraph.
Using Text Styles for MS Word File to KDP
Another common error when formatting a book is that people highlight text and then apply styles (make it bold, underline it, increase size) to make a heading. Unfortunately, this creates inline HTML, which e-readers don’t like. You don’t have to know what it is or how it works, you just have to know NOT to use it. Microsoft Word has a great tool for creating headings (and also TOCs) that applies formats to your headings and subheadings automatically through another kind of formatting called CSS.
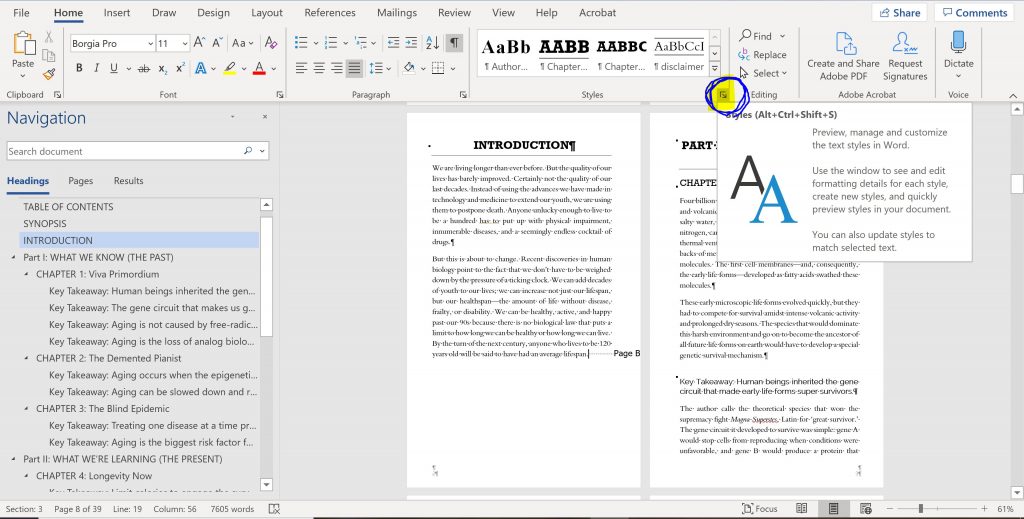
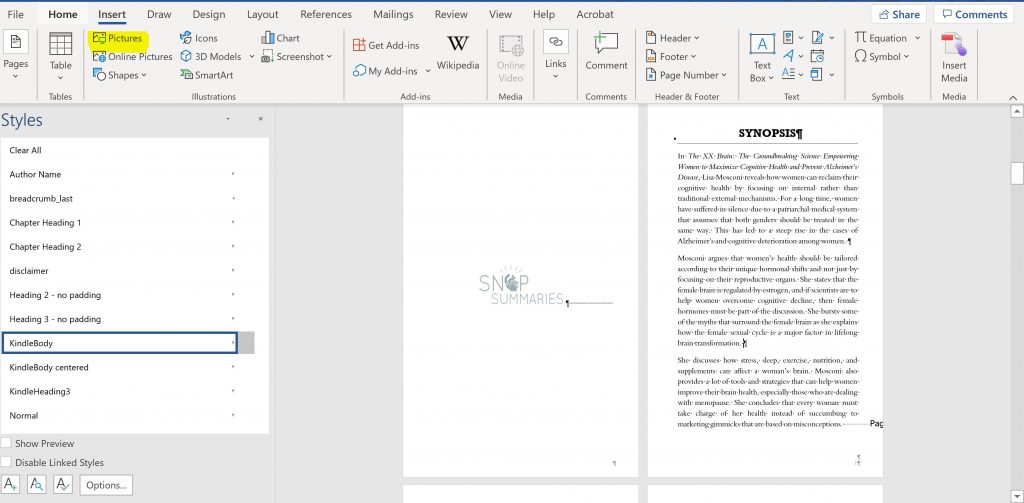
First off, we need to get our Styles Panel into view. So go into your book, and click this little button while you’re in the Home tab:
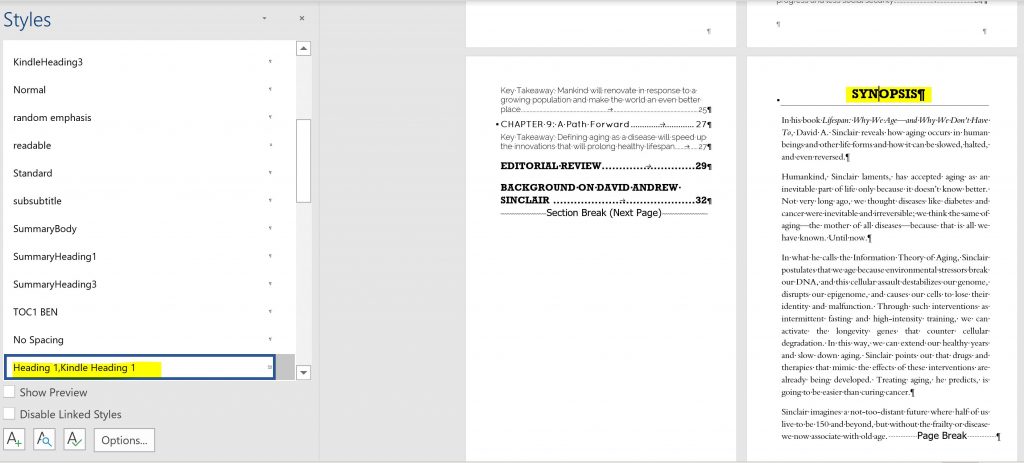
Once your have your styles view panel open, put your cursor into your heading. Then you can see which style it is being assigned on the left. Now drop the cursor into a regular body paragraph. If they both say the same thing (probably “Normal”) it means you haven’t been formatting using styles.
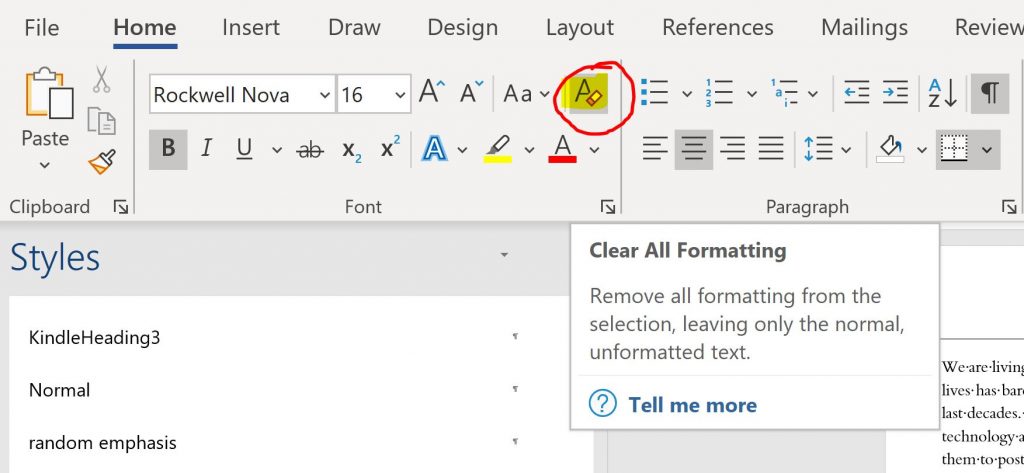
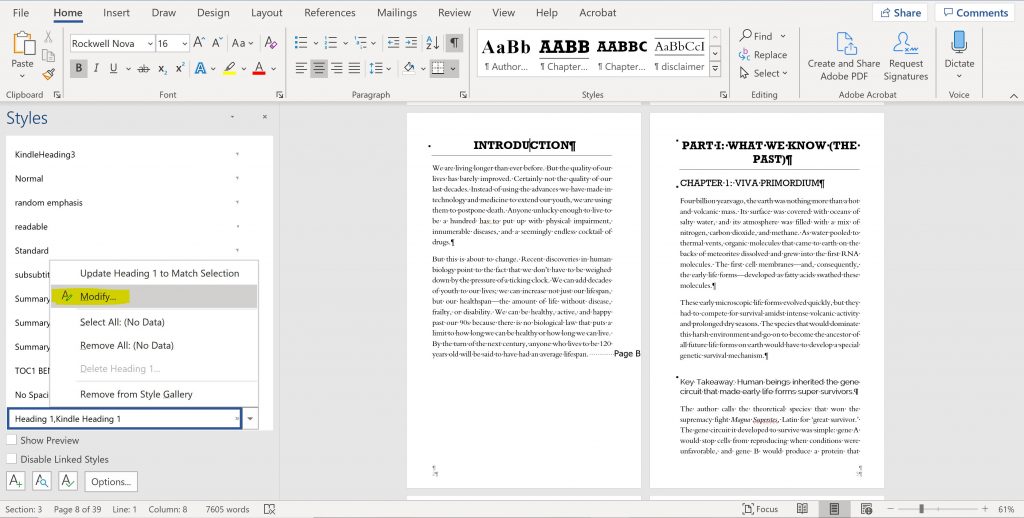
Luckily, this is very easy (though a bit tedious to fix, depending on how long your document is). The way to apply a style is, while the cursor is in the middle of the paragraph, just click the heading you want. You do NOT need to highlight the text, just have the cursor in there somewhere. MS Word of course has preset styles in there for “Heading 1” “Heading 2”, etc., and you can change these styles to match your preferences by right-clicking the style and choosing “Modify.” The important thing is to make sure that text is cleared of other formatting you may have done inline before applying your Header Styles.
Once all of your headings are formatted using the styles, you can then create a Table of Contents that will autofill based on your various headings! Pretty neat.
Formatting Body Text for KDP
Another common error people make is that they hit “Enter” in order to make space between paragraphs. This is definitely wrong and is not how spaces between paragraphs are made:

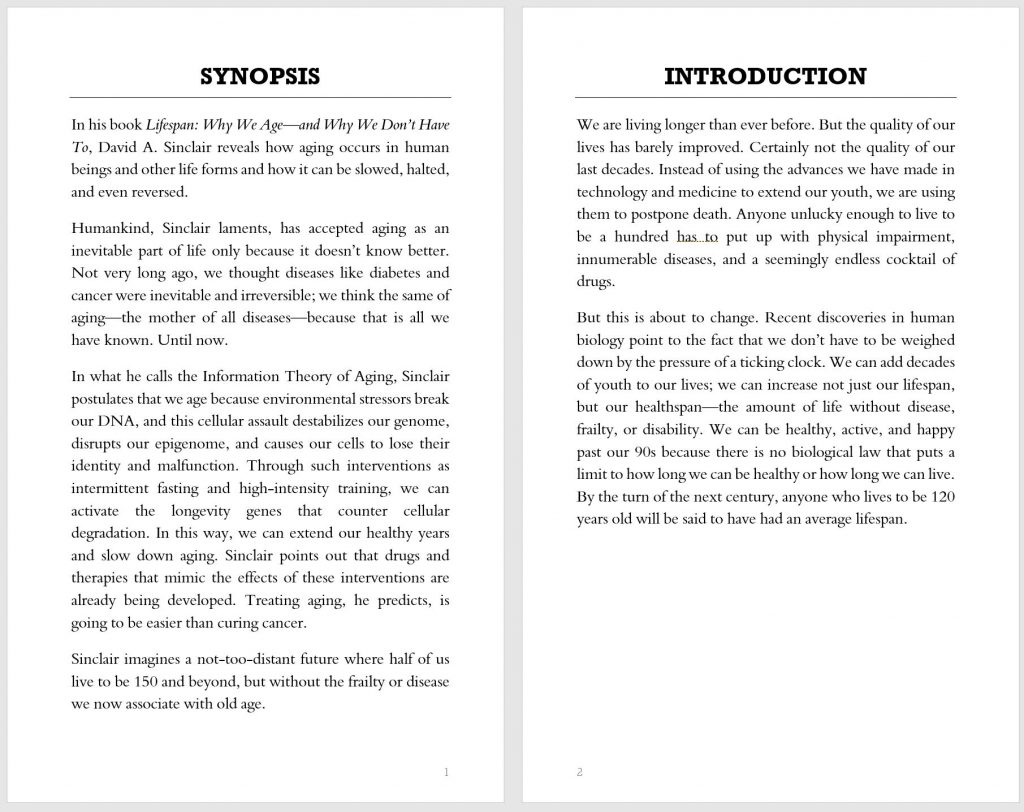
The way to get spaces between your paragraphs is to modify the style being applied to your body text. In this example, my body text style is called “KindleBody,” so I right click to “Modify” > “Format” > “Paragraph” and it takes me to this option where I can change the spaces before and after paragraphs, and be sure that “Don’t add space between paragraphs of the same style” is NOT checked.
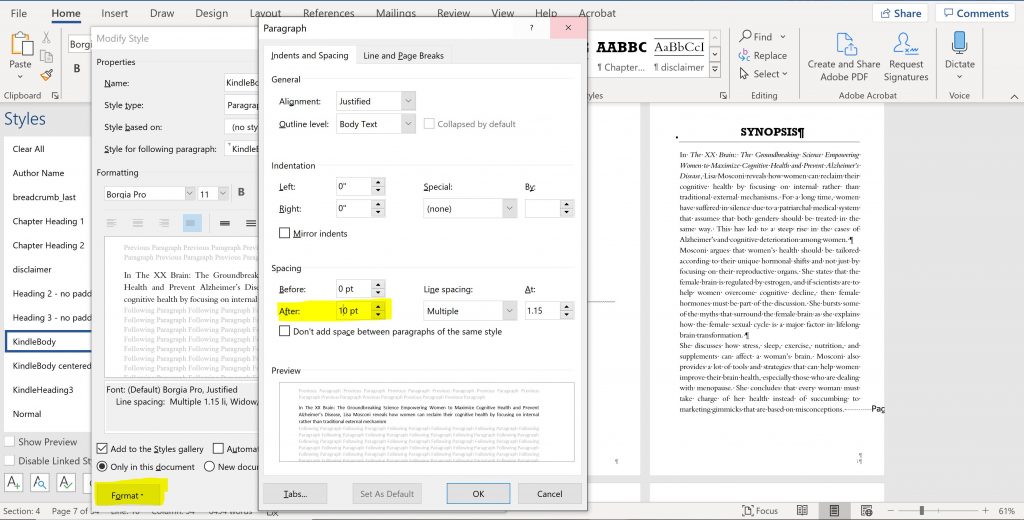
This will add a lovely little space after your paragraphs the proper way. If you want to format your book in a more classic novel style (indentation + no space after paragraph), you will also need to set that in here. If you are used to hitting “tab” to indent your paragraphs, KDP will NOT recognize this. It will only recognize indentations set as paragraph styling in this window.
Adding a TOC in Word for KDP
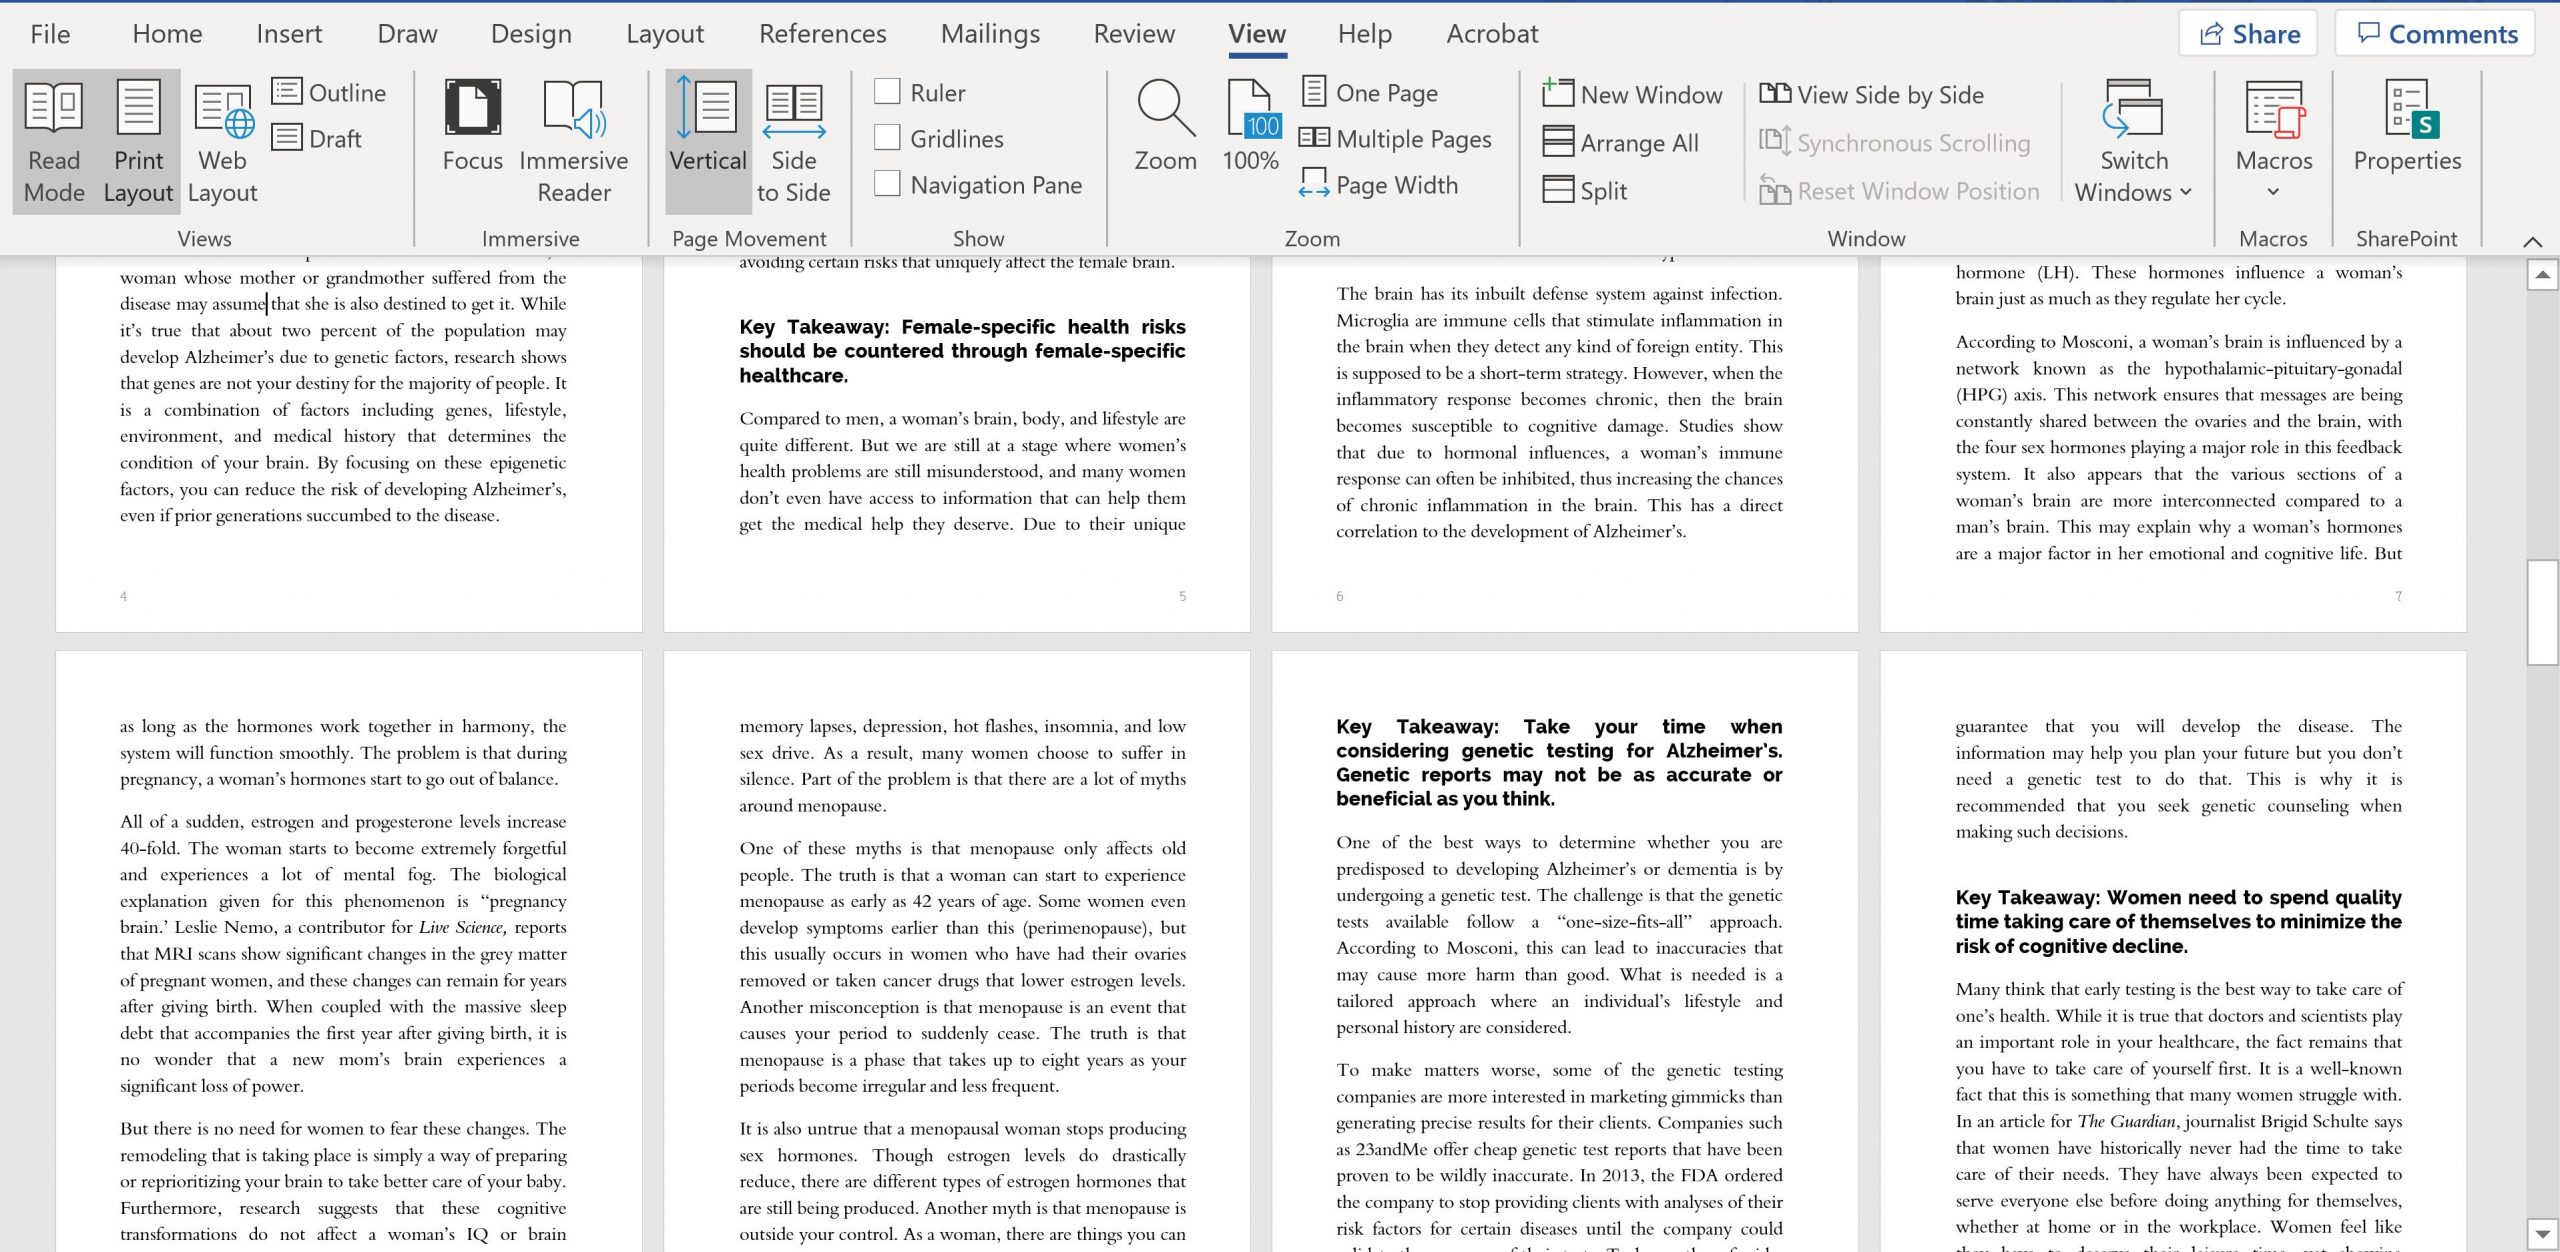
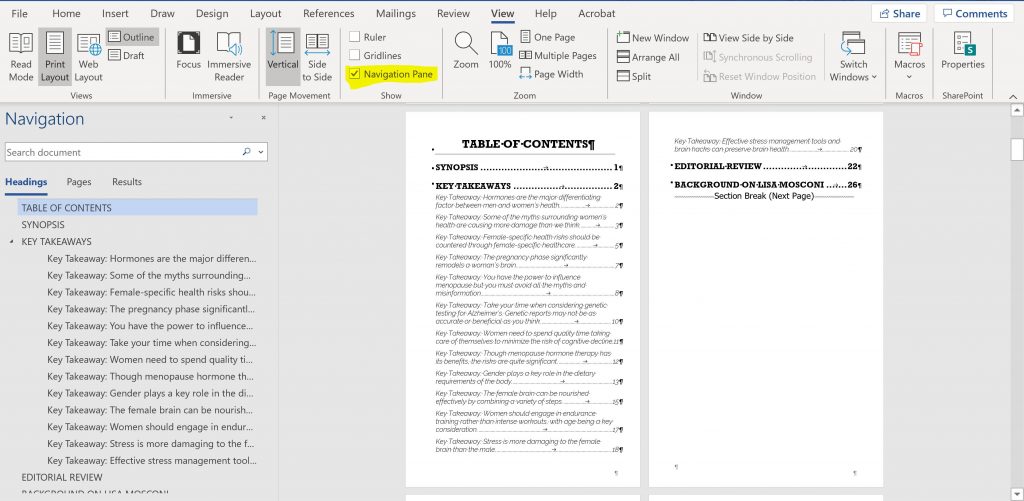
Once you have your headings and styles all applied, creating a Table of Contents in Word is super easy, and KDP will automatically recognize it. Just remember that page numbers don’t matter in KDP since font size can be changed, so these need to be hyperlinks. First thing is you want to turn on “Navigation Pane” in the “View” tab so you can see which headings your document has recognized. You can see on the left I have some top-level headings and some sub-headings (the “key takeaways”).
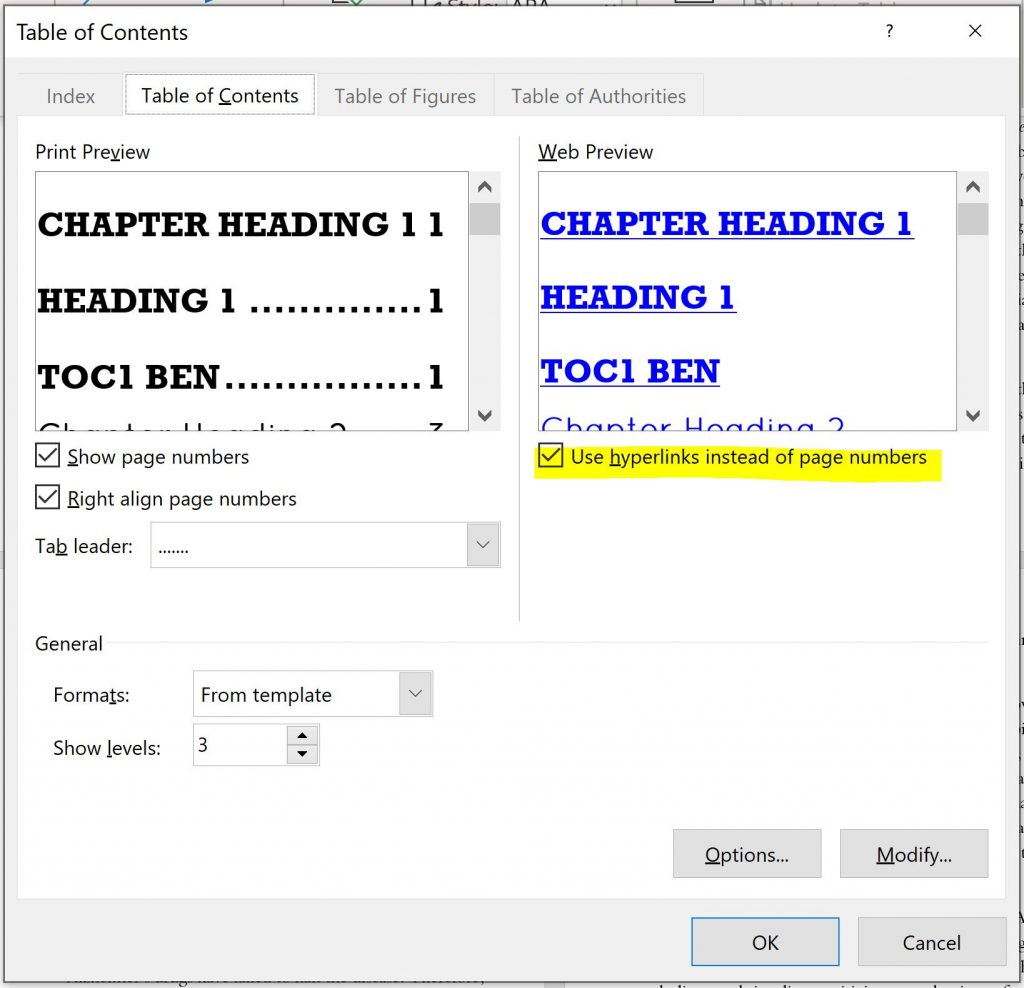
To create your own TOC, you need to go to the References tab > Table of Contents > Custom Table of Contents. Put your cursor wherever you want your TOC to go. Once you’re in the dialog box, you need to choose how many levels will show up in your TOC. Maybe you only want main chapter headings, but not sub-headings, so then you would only chose “1”. Make sure that “Use hyperlinks instead of page numbers” is checked so that KDP can read it. Then just click “OK” and voila!
Please keep in mind if you make changes to your document after you insert the TOC, it will not auto-update page numbers (though the links will always work). For paperback books you’ll need to right-click anywhere in the TOC and click “Update page numbers only” or, if you’ve changed a heading title or something like that, click “Update entire table.”
Adding Images to Word Doc for KDP
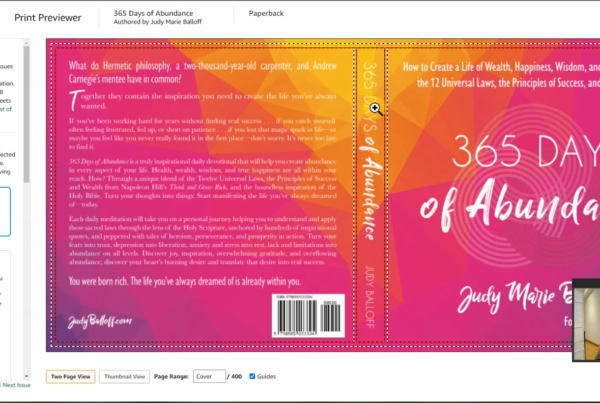
Honestly, if you’re adding images, I would highly recommend using a tool like Calibre that gives you a lot more control over your final product. That being said, you can upload a word doc with images to KDP. Just a few things: make sure that any images have been “inserted” from a file and not copy + pasted.
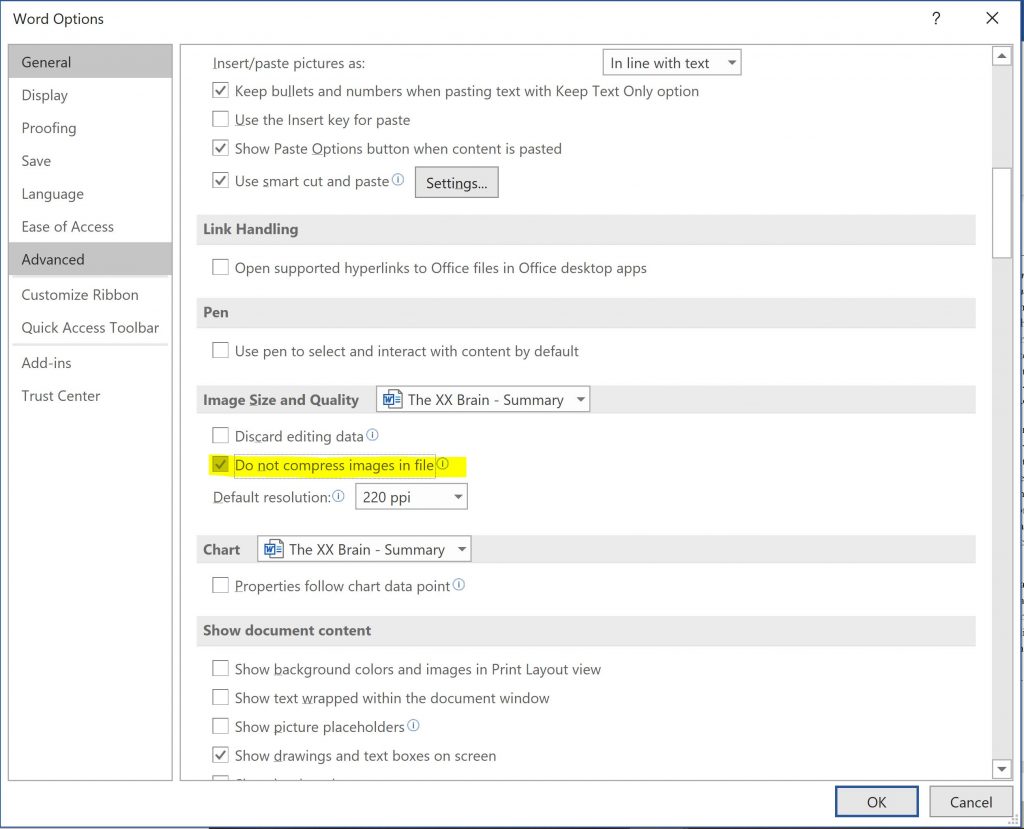
You also want to make sure that no image compression is set. To check this, go to File > Options > Advanced and scroll down to make sure this box is checked. And also make sure the resolution is set to 300ppi. This is standard for high-res images.
AND….that should be it! When you upload your file to KDP, be sure to go through each and every page in the previewer to see how it looks. You may find some weird styling somewhere or something that’s not rendering properly, especially if you’re using images.
Now, if you’re ready to move into the big leagues for your next book, let’s learn how to format using Calibre!