how to publish a book on Amazon
Hey there! If you’re reading this post, I’m assuming you have a completed book ready to be uploaded, but you’re wondering how to publish a book on Amazon. If you still need to format your paperback, check out this post, and if you need help with your ebook, head over here.
Now that you have your finished book all ready to go, I’m going to walk you through Amazon’s backend including setting up an account on KDP, uploading your files to KDP, and finally, how to publish a book on Amazon KDP.
STEP 1: Create a KDP account
Head over to kdp.amazon.com and click “Sign Up.” If you haven’t been living under a rock for the last decade (or if you have a moral objection to Jeff Bezos, which I totally understand), then you probably already have an Amazon account. Go ahead and use that if this is a personal project. But if you’re trying to start a business or you have an LLC, it’s best to use a business email and keep it separate.
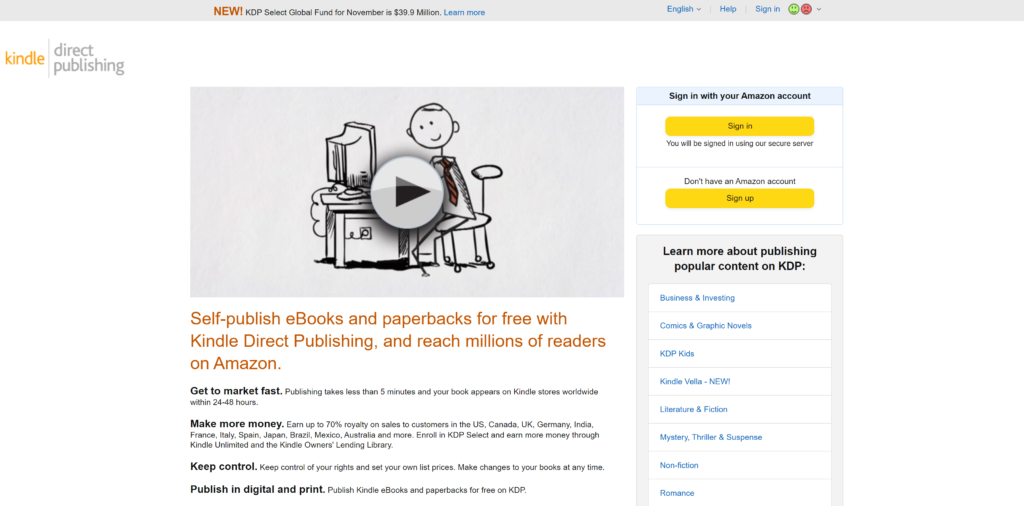
As soon as you click that button POOF! You have a KDP account. But before you can get started, you’ll see a big warning at the top that you need to finish setting up your account.
First things first, add your name and address. If you have a business name, like an LLC, you can put that under “Full Name,” but don’t worry if you want to publish under different pen names or different imprints. This information is only for business purposes and you can choose the author name and publishing company name for each individual title you publish.
My business name is Emdashery, but I also publish books under ZIP Reads, for example, all under the same account.
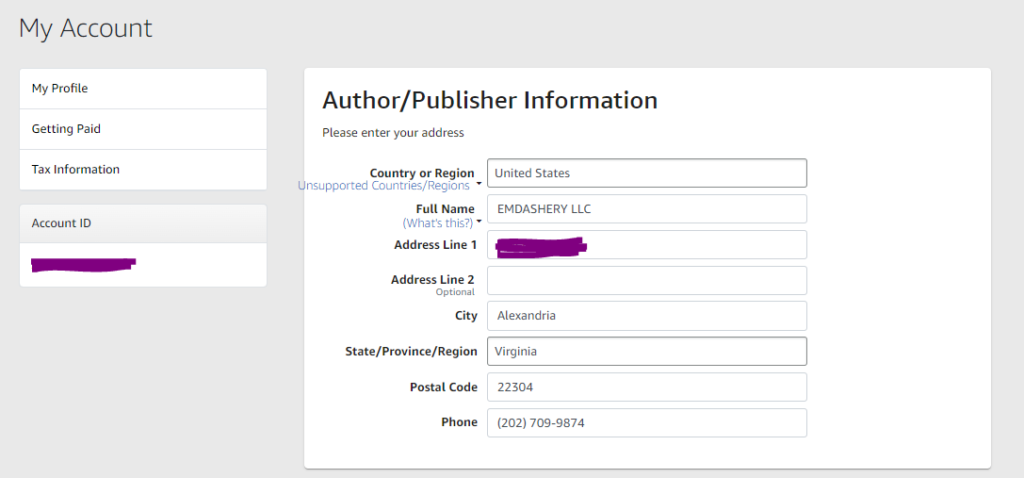
Once you get your basic info added, you’ll need to set up your tax information through their “tax interview” that creates the IRS form called W9. Assuming you’re in the United States, you will do this using your name and SSN. Even if you have a single-member LLC and a business name, you still need to use your first and last name as that is how the IRS recognizes you for tax purposes.
Here is what mine looks like:
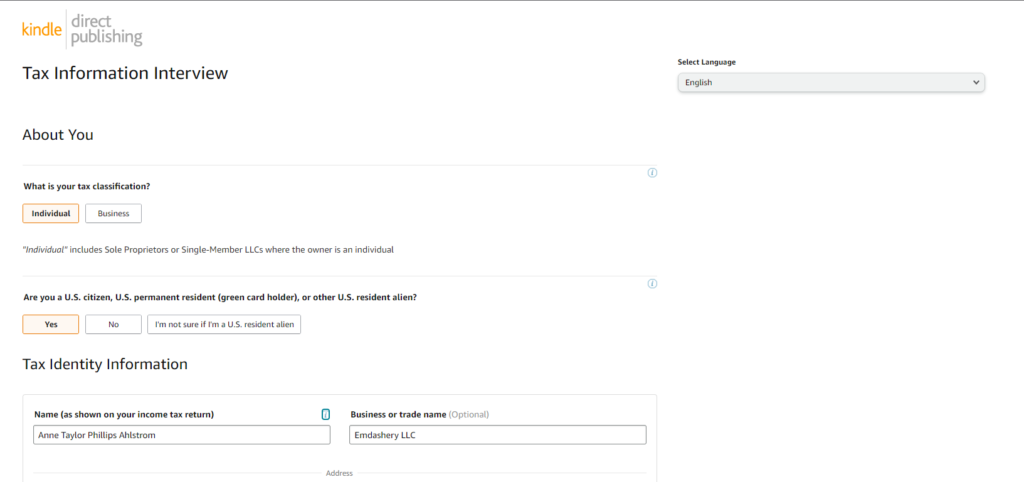 Again, even though it asks for EIN or SSN at the bottom (not pictured above), if you are a single-member LLC, you will still use your SSN instead of EIN. You can go ahead and try to put your EIN in there, and it will just reject it anyway.
OK! Now that your W9 is submitted, you need to add an account where they can pay you. I feel like this part is pretty self-explanatory, but just remember the name on the account needs to match the name on your tax form. It can be a business account or personal account (always better to use a biz account if you have one!) but the name HAS to match. You can use your US bank account to receive royalties from ALL the different Amazon marketplaces around the world, you don’t need to have an account in every country!
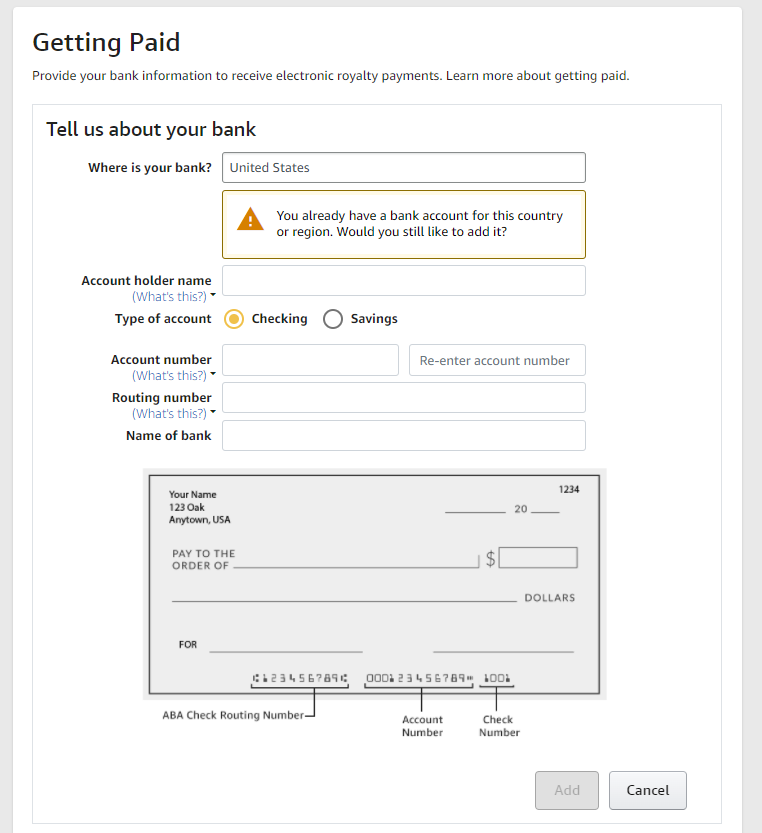
If you’re based in the United States, it will tell you you’ve been approved for a 0% tax withholding rate. This doesn’t mean you don’t have to pay taxes. It means they don’t withhold the taxes for you. You 100% have to pay taxes on royalties from Amazon, and if your books are really selling, you should be putting away about 25% of all the money you make (after expenses) to pay the tax man at the end of the year. For a detailed guide on how all that works, you can check out my post on finances for freelancers.
STEP 2: Add your ebook title
I’ve provided step-by-step instructions below along with screenshots of the entire process, but you can also watch this here video to have me walk you through it!

Most people will probably be publishing both a Paperback and Kindle, but let’s start with the Kindle process. So click on that “Add Kindle Book” button and let’s get started!
The first thing you need is your title and subtitle. Note that Amazon will automatically include a colon between the two, so you don’t want to add one yourself.
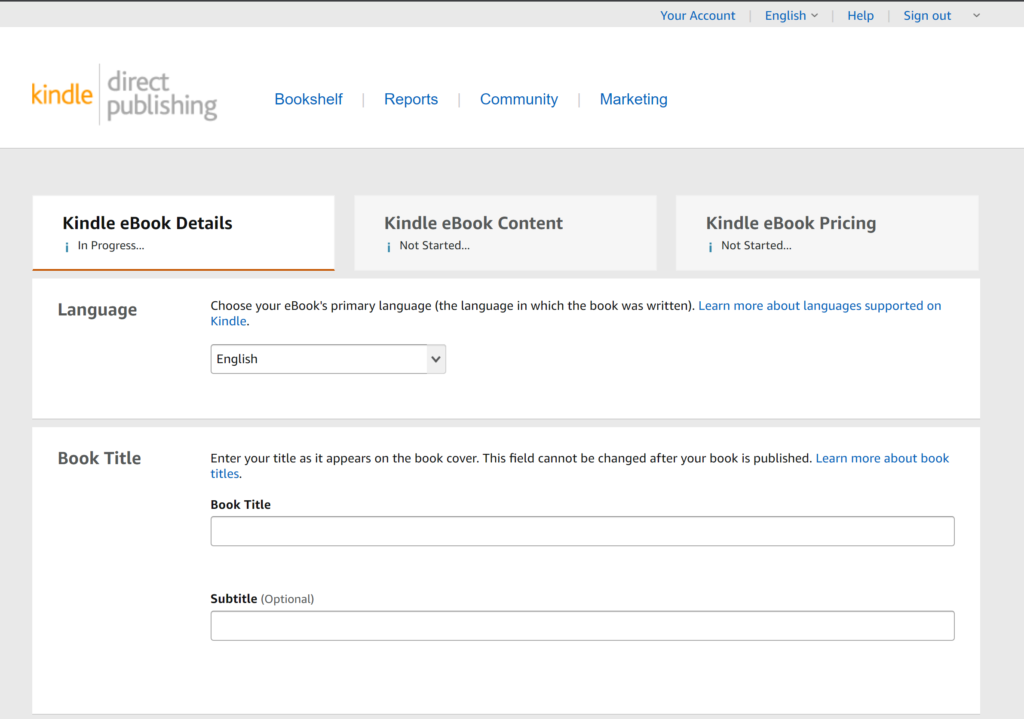
Triple check the title for any typos or spelling errors, as once this is completed, it CANNOT be changed. Also, make sure there isn’t a space at the end of your title, or there will be a space between your title and the colon!
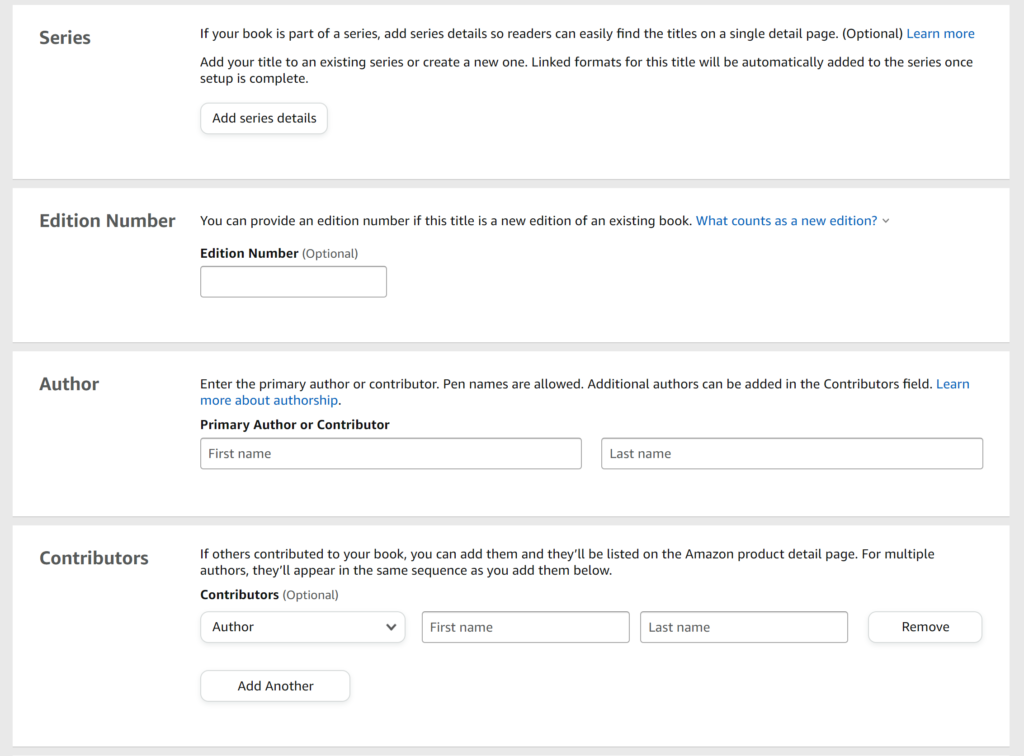
If you’re publishing a series, you can put that information here, but for most first-time authors you can skip the series and edition number parts. For “Primary Author”…that’s you! If you want to use a pen name, add it here. This is the name that will show up when people search your book on Amazon (NOT the name that you added to your tax form).
For Contributors, you can add as many as you need to. If you have an illustrator or a preface written by someone famous, add it here. Note that for “editor” most people do NOT include the editor they paid to fix grammatical errors in their book. This editor is for the type of person who compiled an anthology or something like that.
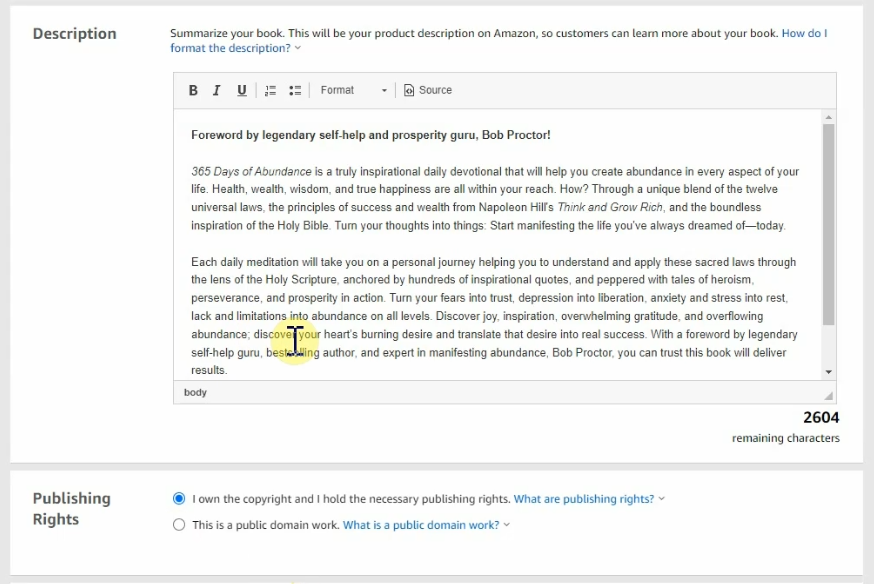
STEP 2: Write your book description
Ok…this next part is VERY important. Not only will your book description be the first thing potential readers see when they land on your page, Amazon also uses it to decide which keywords your book should rank for. I will devote an entire blog post to writing an enticing book blurb, but I’m only one woman! For now, just make sure it has a good hook in the first sentence (what value are you providing to readers or what’s the main point of suspense in your novel?).
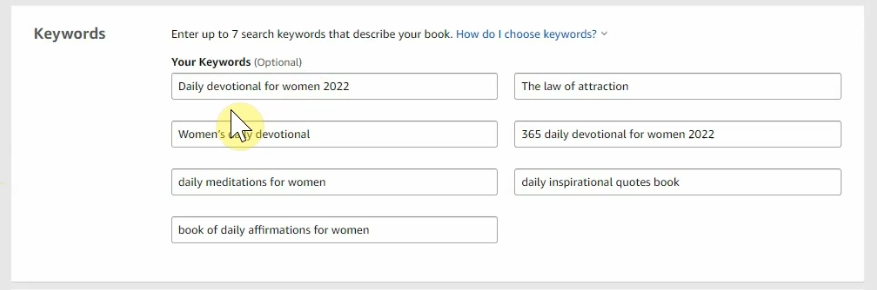
STEP 3: Choose your keywords
Equally as important as your book description are your keywords.
One of the easiest ways to get started here is to head over to Amazon.com and start typing in the words you think are related to your book! Amazon will populate a drop-down list that will help you get started. Dave at Kindlepreneur (an awesome resource!) gives specific advice on how to check if a keyword is making money…there’s no point in ranking for a keyword if people aren’t searching for it!
I’ll be adding a post on how to choose the best ones, but for now, head over to Dave at Kindlepreneur for some excellent advice on choosing the best ones!
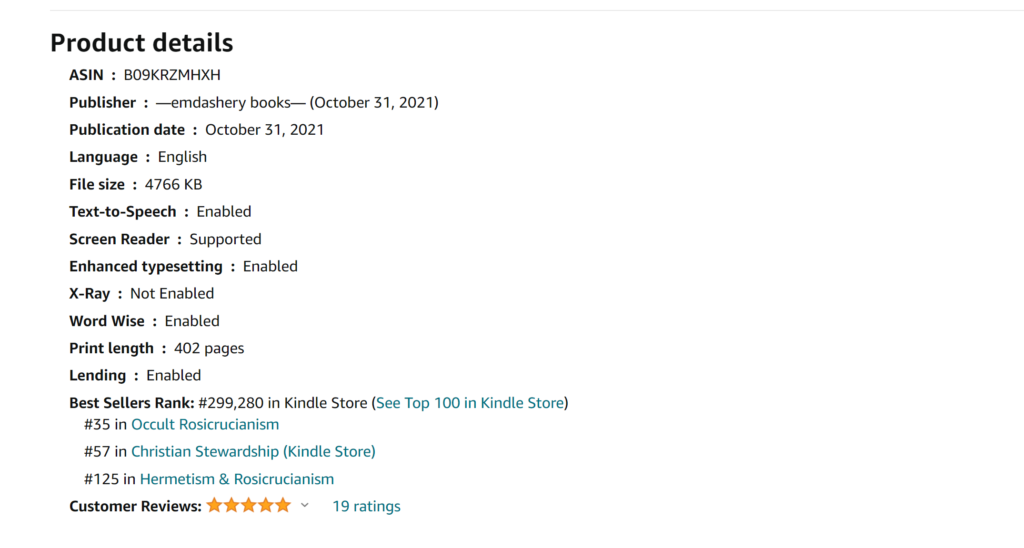
STEP 4: Choose your categories
Choosing the right categories can make or break your book in terms of getting that coveted #1 bestseller rating. The key here is to choose categories where the top-10 bestsellers aren’t selling all that well.

This is a very time-consuming process, and another thing I will be writing a blog post on in the future, but you’ll want to look at any categories relevant to your book and then look at the sales ranking for the bestsellers in that category. If the #1 book in a category is ranked #200,000 it will be easier to beat it than if it is ranked #1,000. Even better if it’s ranked #1,000,000. This is a very tedious and time-consuming process, but it’s 100% worth it to get your book to rank right out of the gate!
I’ll be adding a post on how to choose the best ones, but for now, head over to Dave at Kindlepreneur once again for some excellent advice on choosing the best ones!
STEP 5: Upload your ebook
Now for the fun part! Go ahead and click “Yes” to DRM (this stops your book from being copied and shared without your permission) and then upload your ready-to-go .epub file. Please please please do NOT upload a Word doc even though Kindle allows it. Use a free tool like Calibre to convert your book to epub and then upload that. It gives you far more control as to how your book looks on Kindle devices.
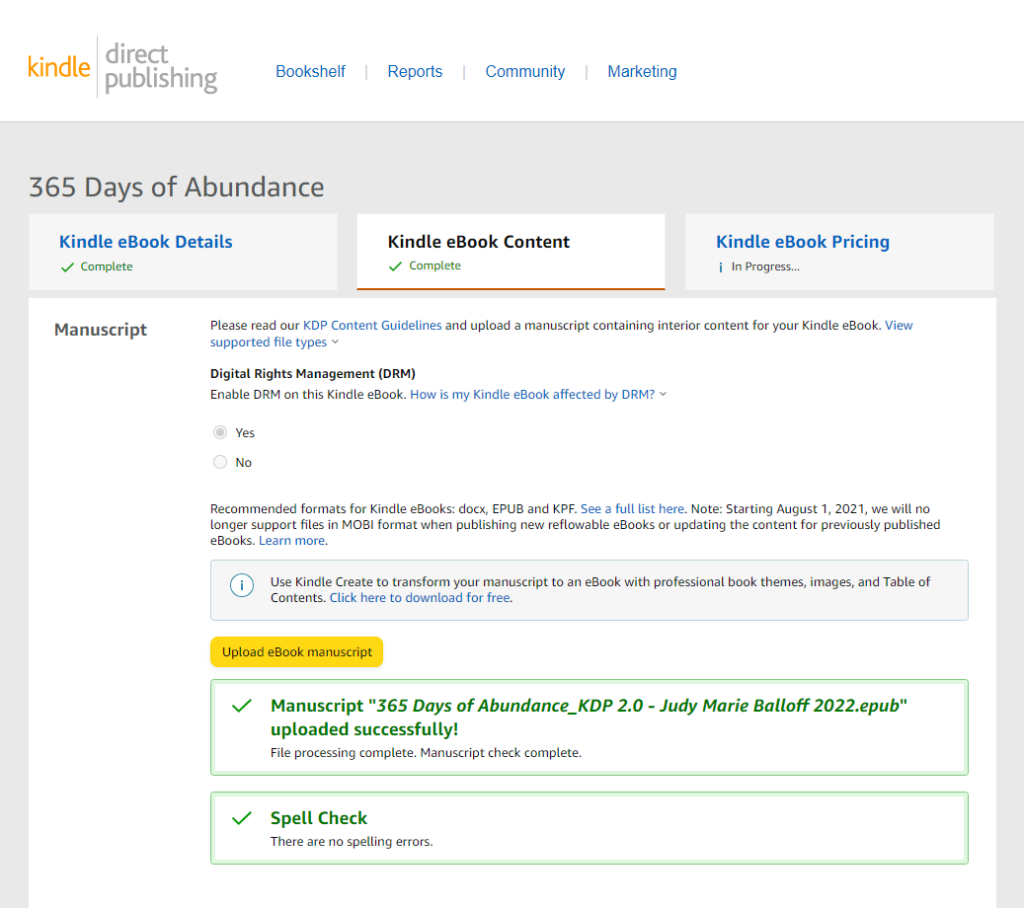
Hopefully you don’t get any errors when you upload, but if you do, drop me a line and I will troubleshoot it for you.
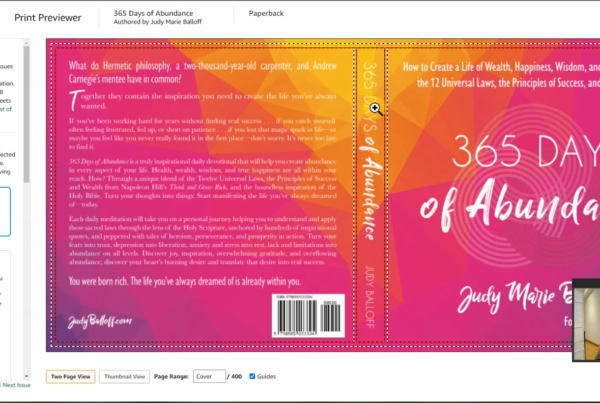
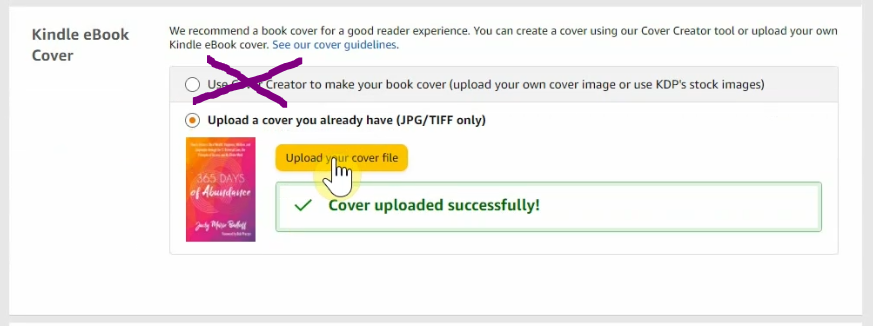
STEP 5: Upload your book cover
Hopefully you have a beautiful, professionally-designed cover ready to go. If you don’t, and you’re thinking about clicking that “Use Cover Creator” button–STOP RIGHT THERE. Never, never, never, never use Amazon’s cover creator. They are heinous and terrible and your book will never sell; I guarantee it.
Make sure you cover adheres to KDP guidelines, which you can find here. Basically it should be a JPG that is 2560 pixels tall and 1600 pixels wide.
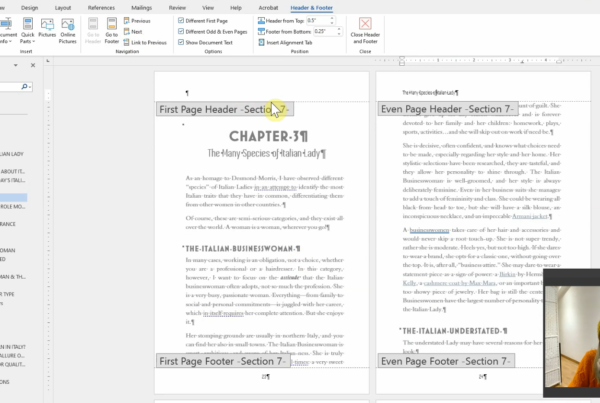
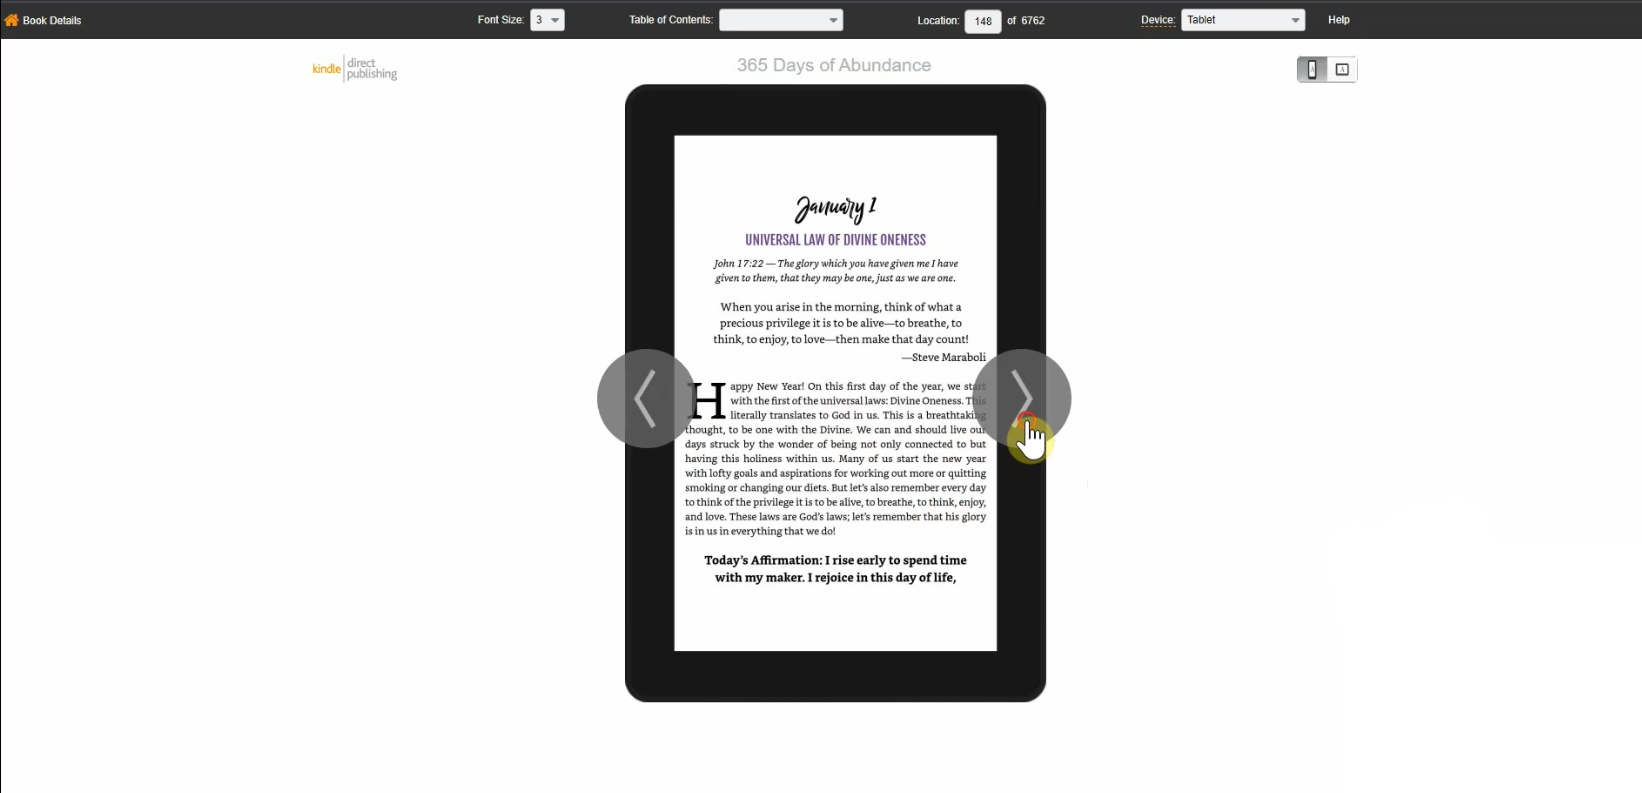
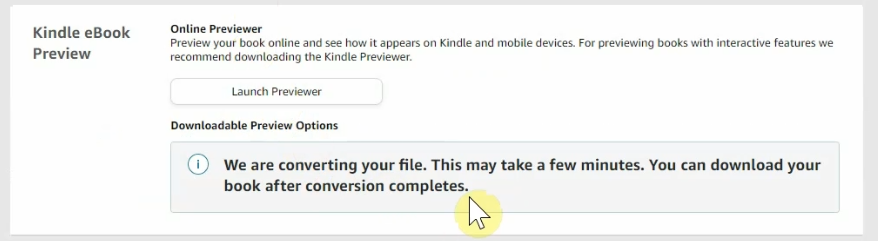
STEP 6: Check your book in Kindle Previewer
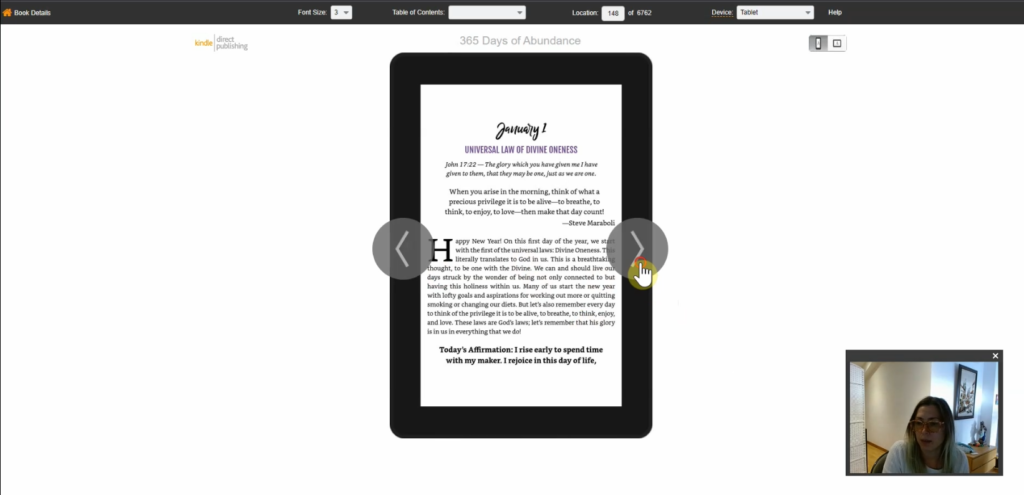
Once your cover and ebook have passed the automated approval process, you can click “Launch Previewer” to see how your book will look in Kindle, on a phone, or on a tablet. Please note this is NOT an exact science, and different readers and devices will render your text a little differently. This is why it’s always best to use pre-loaded fonts that are compatible with all readers.
Make sure to go through EVERY PAGE in your book. Don’t just assume everything looks fine and skip to the end. There can be weird coding on a paragraph, weird spacing, your chapter headings can look wonky…a million different things.
Once you’re happy with each and every page (this may take a few tries IRL, but we are assuming you already have a perfect book here), then click on “Book Details” to return to the main page.
STEP 7: Add your ISBN
You do NOT have to buy an ISBN from Bowker to publish your ebook. You can absolutely use the free ISBN from Amazon. However, if you’re publishing your book across multiple platforms like Apple Books and Google, it’s best to have a unique ISBN for your book. You can buy a 10-pack from Bowker for $295, and it permanently registers your book in the database of all books for all time.
If you choose to go the free route, know that you will be getting a different digital ISBN from each of the different publishing companies. You will also have a different ISBN for your paperback and hardcover versions as well.
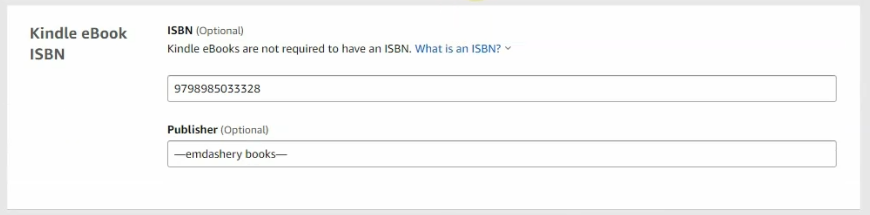
As for the publisher name, it’s totally up to you! If you have a real LLC for your publishing company, go ahead and put your name here. Or you can make one up!
If you choose to use Amazon’s free ISBN, your book publisher will show up as “Amazon Independent Publishing”, though in some cases they will display the name you put here. I’m honestly not sure how that works.
STEP 8: Set pricing and marketplace
Congrats! The hard stuff is done! The final page asks you to choose your distribution, whether or not you want to join KDP select, and then set your pricing in all the different markets.
If you’re not planning on publishing your book anywhere except Amazon, then 100% choose KDP select enrollment. You will get access to set your book to free for 5 days every 90 days, which can really help with marketing, and you will also get paid by the page for people who read your book as part of Kindle Unlimited.
If you want to publish your book through other distributors, then leave this off. You can’t price your book below $0.99, but you can sell copies on your own website, or through Apple Books or Barnes & Noble or any of the other guys.
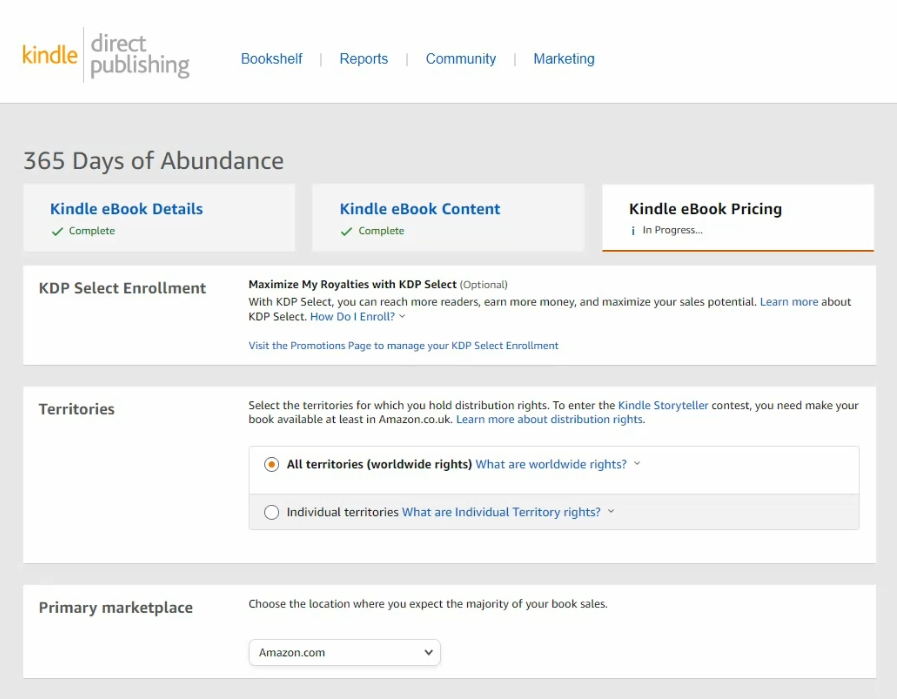
As for territories, go ahead and leave it set to “All territories.” It doesn’t cost you anything, so why not?
Last but not least, set the pricing for your book! This is also deserving of a blog post on its own, but you can look at similar books in your genre and see what they’re priced at. It’s a little more of an art than a science, and once your book is selling, you can try raising the price and seeing if it sticks until you get in that sweet spot.
Note that unless you want your book priced at $0.99, there is no reason to choose the 35% royalty rate. Also, be sure to look at the delivery cost that they show. If it seems high, your book file is probably way too large and your images need to be resized. Yet another thing I’ll be writing a blog post on!
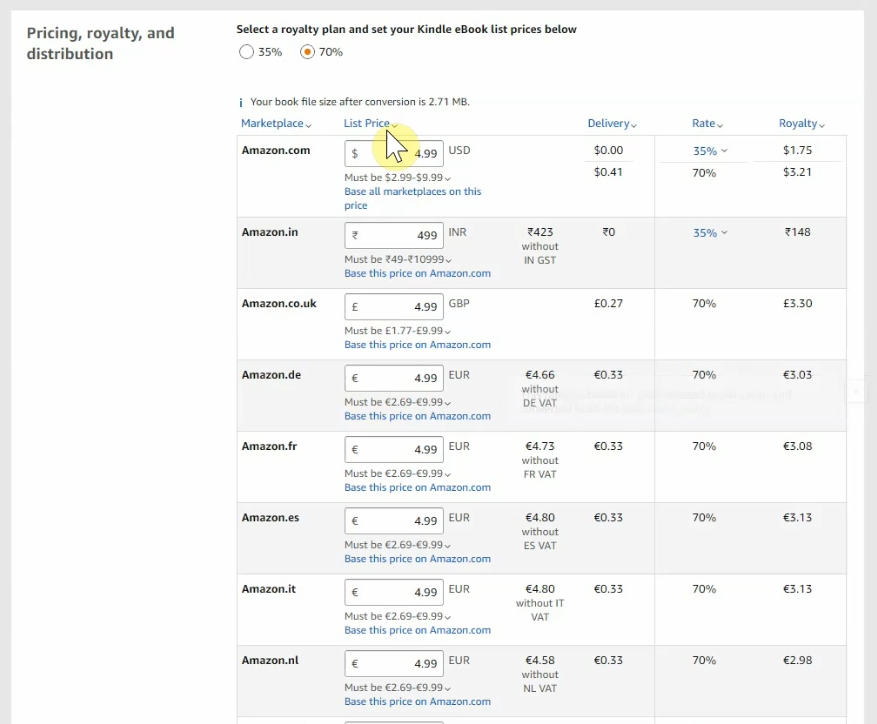
Note that Amazon will match the lowest price it finds on the internet. So if you’re selling your book on Apple for $4.99, but price it at $7.99 on Amazon, they will automatically change it to $4.99.
You can choose a different price for all the different markets if you like. I’ve decided to keep it under “five bucks” basically, no matter where you are. So even though 5 euros is more money than 5 dollars, I want people in Europe to have the same “this costs less than five bucks” reaction. This is totally up to you!
STEP 9: HIT PUBLISH!
AAAAAAND YOU’RE DONE!
Hit that publish button and your book should be live in about 24 hours!

You ready to get your paperback done now?